• Skip to primary navigation
  • Skip to main content

Social Good Software

Creating amazing guest experiences through innovative software solutions for the social good community

  • Features
    • Deduper
    • Calendar Builder
    • Email Designer
    • Barcodes Scanner
    • Online Template
    • Checkout Flows
    • Membership Portal
    • Data Bridge
  • Pricing
  • Contact
    • About
    • Contact
    • Careers
  • Login
  • Get Price

Help Center

How to hard refresh your browser

August 17, 2021 By Rick Hernandez

Introduction

When you access a website, the data retrieved is saved on your computer so the website can load faster if you revisit it; however, if the website updates, some browsers continue to load the version of the website that’s out of date. A hard refresh will force a browser to forget the outdated version of the website and load the current version through the server. In this tutorial, we show you how to perform this in a browser.

Follow the command below that applies to your device:

Hard Refresh on MacOS

  • Google Chrome, Firefox, and Microsoft Edge: 
    • Cmd + Shift + R
    • Shift + (Refresh Button in Browser)
  • Safari: 
    • Cmd + Option + R

Hard Refresh on Windows & Linux

  • Ctrl + F5 
  • or, Ctrl + (Refresh Button in Browser)
  • Ctrl + Shift + R

Hard Refresh on iOS

  • Force Quit Browser then reopen
  • Settings > Safari > Clear History and Website Data
  • Settings > Safari > Advanced > Website Data > (Swipe Right on Website Data)

Hard Refresh on Android

  • Enter Chrome > [•••] (Found in right corner of browser) > Settings > Site Settings > Data Stored> (Either “Clear All Data” or select website and press “Clear and Reset”)

Conclusion

Social Good Software wants to ensure that all users receive the most current version of our website along with any other websites. We want your experience on the internet to be secured, frequently updated, and satisfying as you accomplish your organizational goals. We hope that this tutorial was helpful, and as always, feel free to contact us with any more questions or concerns!
Filed Under: Account, Account, Help Center

Digital membership cards for Altru by Blackbaud

August 16, 2021 By Rick Hernandez

Introduction

This tutorial will go over setting up digital membership cards for use on the web or a mobile device. Nowadays, museum professionals use Altru by Blackbaud to utilize administrative tools to manage their merchandising, order tickets, handle admissions, and build a membership database. Additionally, Altru makes it easier to manage program support and track key performance metrics for stakeholders, and it offers fundraising and donor management, nonprofit marketing, customer relationship management, and event planning. 

Because Altru is web-based, museum professionals access their information from any device with an internet connection, reducing the paper trail, and data entry automation, giving greater record accuracy and unlocking the true potential of administrative automation. 

The time of paper membership cards has undoubtedly passed: digital membership cards reduce the waiting time for the members and the work of the museum workers. The card is now in peoples’ smartphones, giving convenience to both parties involved.

Our focus is on designing these digital membership cards so they display useful information, delivering a unified and enhanced experience for your members. We will go over three types of cards: the Web version and the Print at Home version, which uses the same design as the Web version; the Apple Wallet version; and the Google Pay version.

Web & Print at Home

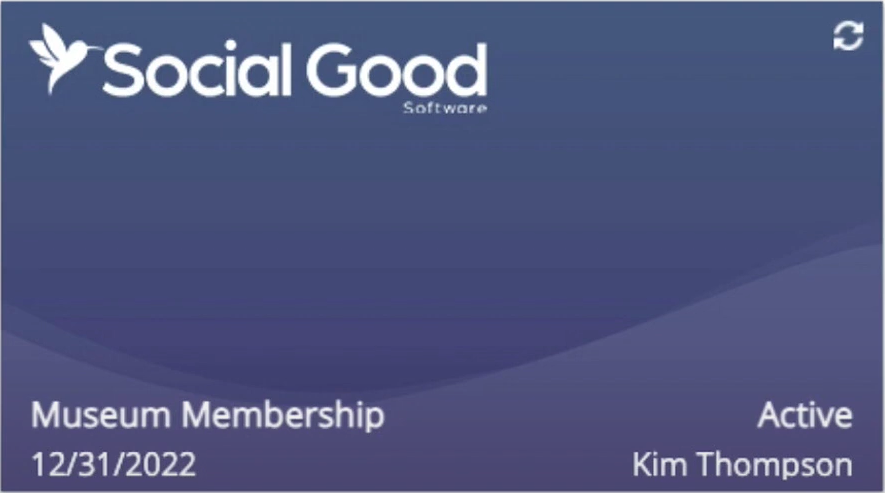
Front of card
Digital Membership Cards

A web version of the card is accessible on any device that has internet access; this is useful for people who haven’t set up their phone’s wallet function, with a built-in function to print at home. Requirements are as follows:

Front of the Card

Please note: supported upload formats include PNG and JPG only.

  • Background design of 450 x 250
  • Mind the “rotate card” icon found in the top right corner
  • Complete freedom of design with the exception of the merge field located at the bottom of the card
  • Merge Fields
    • Choose any color for the merge field section, including transparent
    • Contain 1-4 selected fields
    • If the field is empty, the card will display “N/A”
    • If the value is longer than 20 characters, additional characters will be replaced with an ellipsis “…” (ex. “Kimberly Thompson Jo…”)

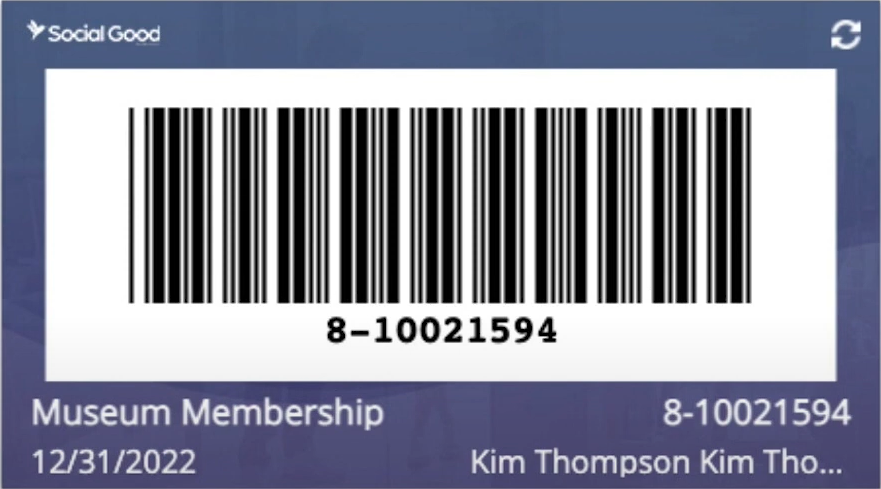
Back of the Card

Please note: supported upload formats include PNG and JPG only.

  • Background design of 450 x 250
  • Be mindful of the “rotate card” icon found in the top right corner
  • Complete freedom of design with the exception of the merge field located at the bottom of the card
  • Be mindful of the added barcode–adding one is mandatory, and location cannot change
  • Merge Fields
    • Unlike the front, no background color selection for the merge field section
    • Contain 1-4 selected fields
    • If the field is empty, the card will display “N/A”
    • If the value is longer than 20 characters, additional characters will be replaced with an ellipsis “…” (ex. “Kimberly Thompson Jo…”)

Apple Wallet

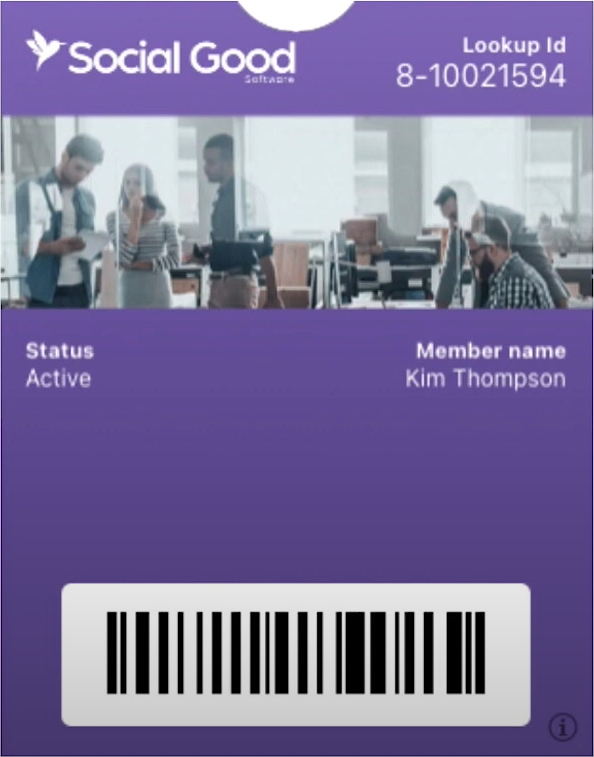
This membership card format displays the membership card and its features using Apple iOS’s built-in wallet functionality. One of the benefits of Apple’s Wallet design is that it is possible to create custom fields, such as stating specific member benefits for different tiers. Requirements are as follows:

Front of the Card

Please note: supported upload formats include PNG and JPG only.

  • Logo image size of 320 x 100, found on the top left of the card
  • Hero image size of 1125 x 432, found in the center of the card
  • You may freely select the background color
  • You may add as many fields as desired, but keep in mind the size of the card will lengthen to accommodate the space needed
  • If the field is empty, the card will display “N/A”
  • If the value is longer than 20 characters, additional characters will be replaced with an ellipsis “…” (ex. “Kimberly Thompson Jo…”)

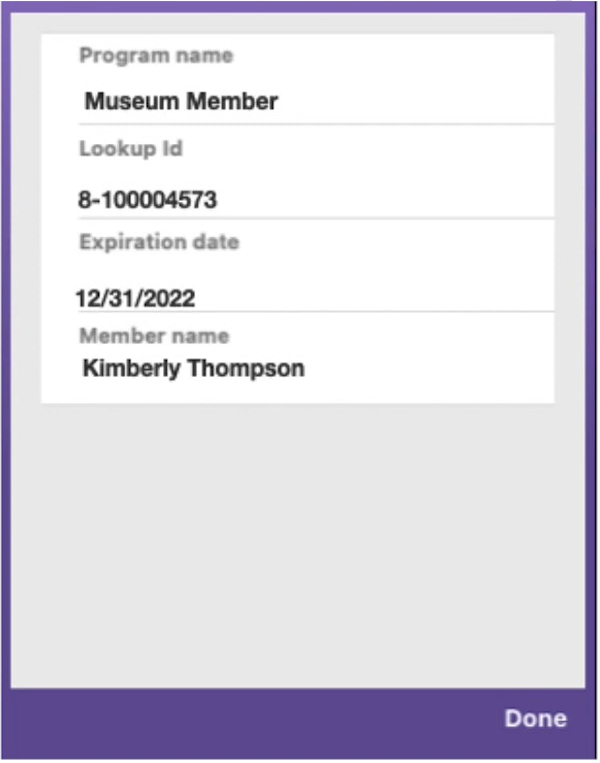
Back of the Card

Please note: supported upload formats include PNG and JPG only.

  • The background color is the same as the front of the card
  • You may have any number of fields enabled
  • You have the ability to set up a custom field with customized static values, such as member benefits
  • If the field is empty, the card will display “N/A”
  • If the value is longer than 20 characters, additional characters will be replaced with an ellipsis “…” (ex. “Kimberly Thompson Jo…”)

Google Pay

Digital Membership Cards

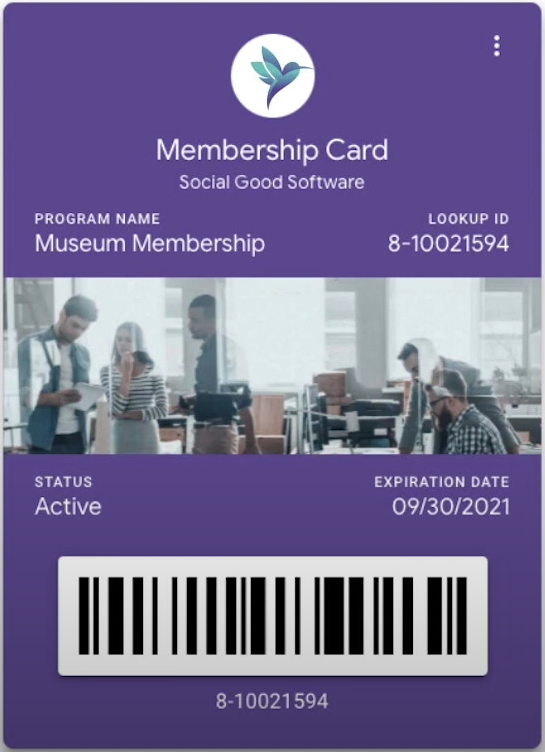
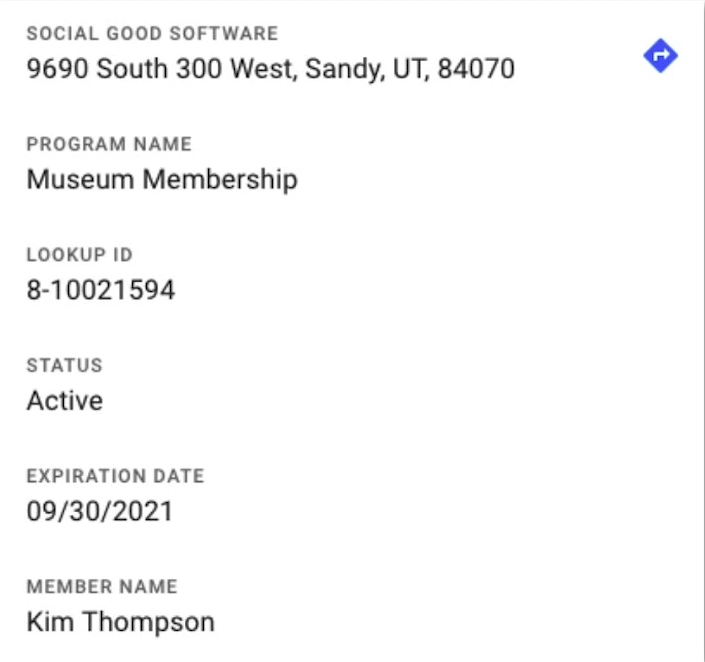
Similar to the Apple Wallet, the Google Pay membership card format provides ease of access by displaying a patron’s membership card on an Android device, and it has the ability to create customized fields. Google Pay’s card differs by making the entire card one-sided; the “back” of the card is actually regarded as the bottom of the card, so the user scrolls down to view the additional information instead of flipping the card over. Requirements are as follows:

Front of the Card

Please note: supported upload formats include PNG and JPG only.

  • Logo image size of 660 x 660, visible at the top center of the card
    • ATTENTION: Incorrect values stated in the video; this is the correct value!
    • Plain white logos will not show up since Google Pay’s default logo background is white; colored logos–or logos that contrast with white–required
  • Hero image size of 1032 x 330, visible in the center of the card
  • Customize background color
  • Barcode required and found on the bottom center of the card’s front
  • Enable as many fields as desired, but keep in mind the size of the card will lengthen to accommodate the space needed
  • If the field is empty, the card will display “N/A”
  • Also, If the value is longer than 20 characters, additional characters will be replaced with an ellipsis “…” (ex. “Kimberly Thompson Jo…”)

Bottom of the Card

Please note: supported upload formats include PNG and JPG only.

  • Unlimited number of fields enabled
  • Ability to set up a custom field with customized static values, useful for features like specific member benefits and perks
  • If the field is empty, the card will display “N/A”
  • If the value is longer than 20 characters, additional characters will be replaced with an ellipsis “…” (ex. “Kimberly Thompson Jo…”)

Summary

Digital Membership cards help speed up the process for those who wish to receive extra benefits as they frequent your business, and we hope to provide you with an expansive set of tools to use so it can be easy and practical to distribute these cards to your members. As always, If you have any questions concerning the video or any other steps in creating these cards, feel free to contact us at any time! To use templates for building your logos, please click on the link below.


Download Card Templates

Filed Under: Digital Membership Card, Email Designer, Help Center

Social Good Software Update 1.3.3v

August 12, 2021 By Rick Hernandez

Deduper

  • Added support to automatically determine who the email address belongs to based on a weighted algorithm

Barcode Scanner

  • Added support for multiple barcode scanners per account
  • All existing barcode scanners will remain available till the end of 2021

Calendar Builder

  • Improved UI to make it more clear on how to setup reserved events
  • Added new logging view to search within logs
  • Calendars are now processed in parallel for data updates

Email Designer

  • Added support for a list of emails instead of a grid of emails when you have more than twelve emails
  • Added support for “Grid” instead of “Receipt Grid” to use the grid with Digital Membership Card
  • Added support to enforce membership type
  • Fixed a minor bug relative to date schedule for future tasks
  • Added new logging view to search within logs
  • Improved support for creating links to be simpler
  • Added support to process emails on their own service workers for immediately, specific date, and relative to the date
  • Added support for ODATA links to be links
  • Emails will only go out if Altru is available
  • Added support to auto fill details when you first create an email
  • Fixed a timezone bug with logs

Online Template

  • Added a fix to save markup when editing HTML markup
  • Added a fix for Safari back button to force a page to reload

Development

  • Membership Card Designer
    • Added the dollar amount on the card with a format
    • Fixed bug with not being able to remove hero image
    • Added support to process data updates in real-time instead of scheduled service
    • Added support to receive incoming questions
  • Data Import
    • You can now create, edit, update, clone, and delete batch imports
  • Ticket Designer
    • Fixed a bug with the editor not showing a preview of text after editing the text
    • Added logs when a ticket can’t be generated by Altru

Data Bridge

  • Added support to batch process attribute updates with Altru
  • Added support to process data updates in real-time instead of schedule service
  • Fixed a bug not to SYNC over “N/A” values to Altru

System Improvements

  • UI improvement for team section
  • Added new logs throughout the application to be able to export data with csv or excel

Filed Under: 2021, Account, Help Center, Software Updates

How to generate Altru Ticket ID

August 11, 2021 By Rick Hernandez

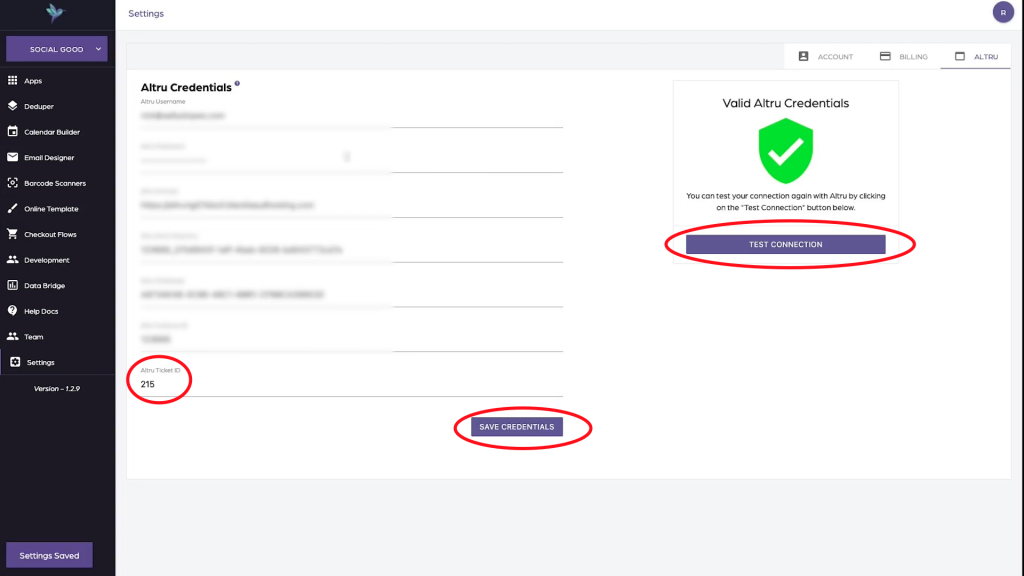
In this guide, you will learn how to get the Altru Ticket ID to generate ticket numbers and attach PDFs to your emails. This process is exceptionally useful if you want to attach automatically generated tickets to emails using the Email Designer.

Steps to generate Altru Ticket ID:

  1. On the left hand side, click on “Settings.”
  1. Click on “Altru,” and locate the file field that says “Altru Ticket ID.” Enter the ID that matches with your business ticketing.

a. Social Good Software cannot retrieve this information for you; therefore, it must be done manually. To find your Altru Ticket ID, purchase a ticket for your business through Altru (of course, this can be a free ticket), and view the ticket using the email sent to your inbox.

Email a ticket to yourself from Altru to receive an eTicket URL. Tis holds the Altru Ticket ID.
Email a ticket to yourself from Altru to receive an eTicket.

b. Viewing the link’s URL, either by looking at the browser URL bar or inspecting the link element, search for “pid=###”, substituting ### for your Ticket ID (ex. 215 or 219).

Find the "pid" inside of the ticket URL to find the Altru Ticket ID.
Find the “pid” inside of the ticket URL to find the Altru Ticket ID.

c. Use the 3-digit number found in “pid” as the Ticket ID. This only has to be entered once, and SGS will save it for all subsequent times you create tickets. Make sure to “Save Credentials” and “Test Connection” when you’re finished entering these changes.

Enter Altru Ticket ID, Save Credentials, and Test Connection.
Enter Ticket ID, Save Credentials, and Test Connection.
  1. Enter the “Email Designer” app. Click into the email you wish to automatically add tickets to. Go into “Settings,” found on the top right side of the screen.
  2. Click on “Automatically generate eTicket numbers”. Save these changes.
    • At this point, if you see a banner on the bottom that says “Invalid Ticket ID,” refer back to step 2a to retrieve the correct Altru Ticket ID.

Summary

Obtaining the Tickets ID from Altru is somewhat challenging, but it’s very beneficial to the organization once you acquire it. It provides the automation tools necessary for generating tickets and cutting down on menial tasks. It will give you more control over ticketing and less headache printing tickets and assigning to various guests, giving them a better experience and enabling you to help them more.

As always, if you have any further questions about generating tickets, or if you are missing information, do not hesitate to contact us!

Filed Under: Account, Account, Help Center

How to reset your password

August 5, 2021 By Rick Hernandez

Passwords help secure your account and keep your information private to you and those authorized to access it. However, it is hard to keep track of passwords at times. With the Reset Password option of Social Good Software, you can easily change your password that you forgot. Just follow the step below:

  1. Go to the Login Page of Social Good Software, and select the “Forgot Password” option.
  1. Enter the email associated with your Social Good Software account and press “Reset Password.”
  1. Open your email address in another browser and find the message sent to your inbox from Social Good Software about your password information. This email contains a verification code that you can use to reset your password.
  2. Copy the code, and then go back to the Social Good Software password page and paste the code in the box that says “Verification Code.”
  3. Reset your password by typing in a new password and pressing “Set New Password.”

Note: This option will not work with unknown emails but let you redirect to the account creation page.

If you follow these steps correctly, you can again log in to your account as usual with your new password. Keep this password handy–write it down, and keep it safe!

Filed Under: Account, Account, Help Center

Automated email first time purchase query digital membership card

July 30, 2021 By Rick Hernandez

Filed Under: Development, Digital Membership Cards, Help Center

How to clean up a constant contact list

July 9, 2021 By Rick Hernandez

Introduction

Having clean data is necessary as you can use these lists for marketing or any promotional activity from your organization. Make sure to clean your records from tools like Constant Contact and Mailchimp before you sync it over to have consistent data within Altru. Learn how to free your Constant Contact list from bad records without exerting a lot of effort in sorting and cleaning your data using the Data Bridge.

Cleaning up a Constant Contact list

1: Log in to your Social Good Software account.

2: Proceed to Data Bridge.

3: Click on create widget button.

4: A dialog box will pop out wherein you need to put on the name of the Widget before you click Next.

5: Select the widget type then click Next.

6: You now have a new Widget. Click on it and authorize it to go into Constant Contact.

7: Once it was authenticated, on the Widget Settings under Mailing List select the list that you want its data to be clean up. In this illustration, we will go with New Members.

8: Proceed to the Data Cleanup where you can see your first 500 rows of record based on the selected mailing list and start cleaning it up.

9: On the left side of the window located the options that you can enable and disable. Each of these options has different rules that you can take advantage of to have a consistent record. You can also test your configuration to see what works for you and Save Settings.

10: If everything looks good, export as a CSV or XLS format to perform a spot check. The option to export the data is located at the bottom part of the window.

11: Open the document to see if all the data is nice and clean; spot check if necessary. If you found inconsistent data, you can fix it manually.

12: You can now reimport this clean list of contacts into Constant Contact. 

Summary

These options are specially made with the intention of helping you clean your data from tools like Constant Contact. Repeat this process to all your lists before you sync it over to Altru to free your records from any bad data.

If you have more questions, please reach out to us through our support channel.

Filed Under: Data Bridge, Help Center, Implementation Guide, Integrations

How to prevent duplicate emails when creating household records

July 8, 2021 By Rick Hernandez

Uncheck the Copy email address to household and members option

Filed Under: Data Merge, Deduper, Help Center

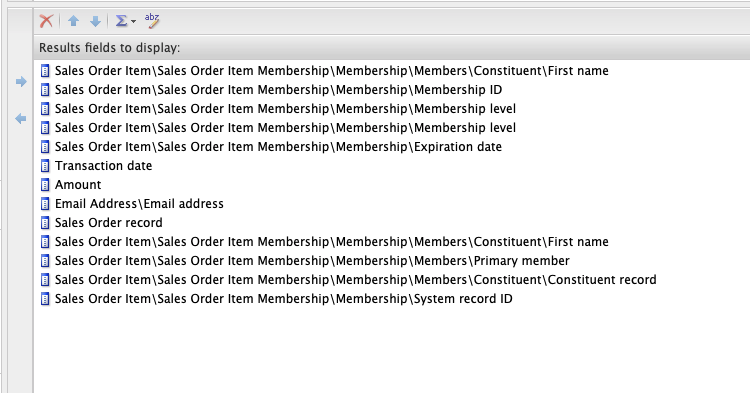
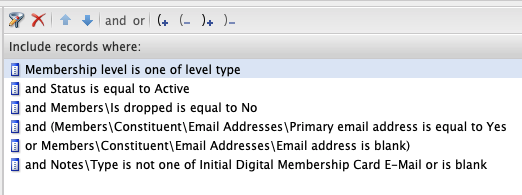
Membership Query Example

June 23, 2021 By Rick Hernandez

Filed Under: Development, Digital Membership Cards, Help Center

How to create a constituents query

June 22, 2021 By Rick Hernandez

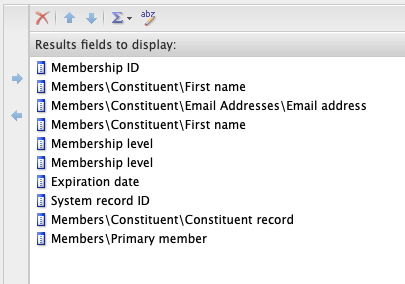
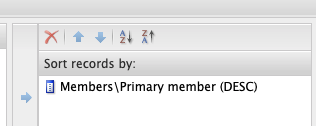
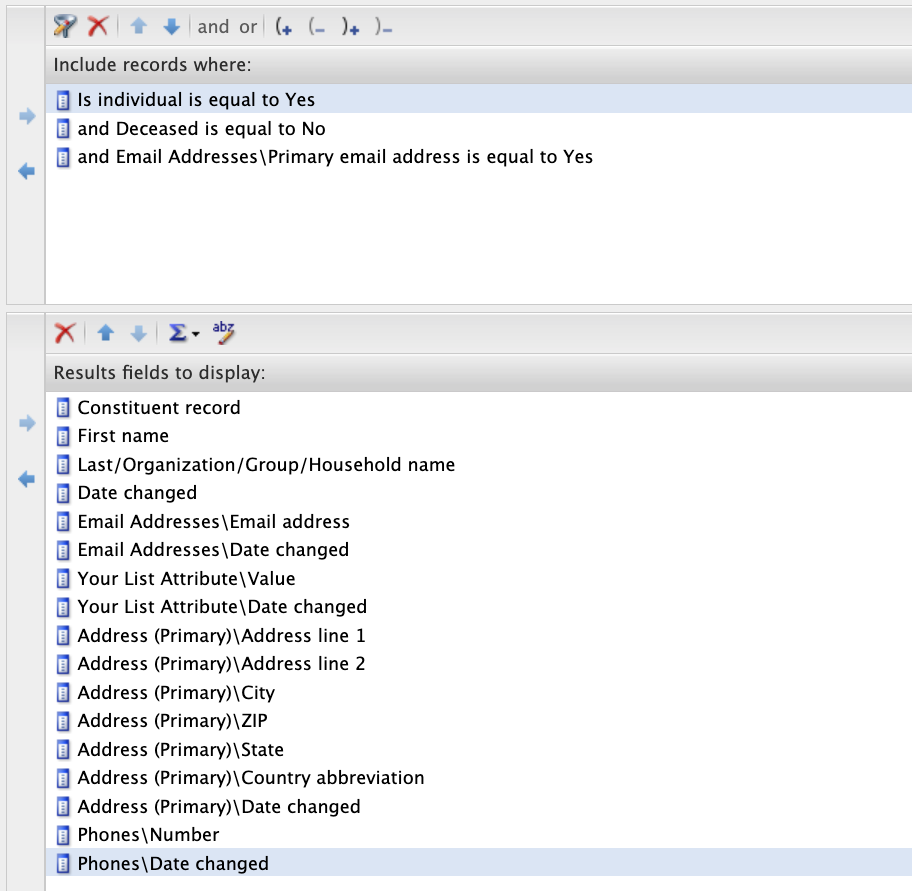
Below is a basic query to pull most used constituent data.

Basic query for constituents

You may add additional restrictions in the “Include records where” section depending on the results you want to pull. For example, if you would like to fetch records for constituents that have been added this year, you should include the “Date added” restriction:

Filed Under: Data Bridge, Help Center, Query Examples

  • « Go to Previous Page
  • Page 1
  • Interim pages omitted …
  • Page 8
  • Page 9
  • Page 10
  • Page 11
  • Page 12
  • Interim pages omitted …
  • Page 20
  • Go to Next Page »

Social Good Software | Altru software integrations | Deduper | Calendar Builder | Email Designer | Barcodes Reader | Checkout Flows | Membership Portal | Online Template | API Integrations