• Skip to primary navigation
  • Skip to main content

Social Good Software

Creating amazing guest experiences through innovative software solutions for the social good community

  • Features
    • Deduper
    • Calendar Builder
    • Email Designer
    • Barcodes Scanner
    • Online Template
    • Checkout Flows
    • Membership Portal
    • Data Bridge
  • Pricing
  • Contact
    • About
    • Contact
    • Feedback
    • Careers
  • Login
  • Get Price

Deduper

Implementation Guide of Deduper

June 2, 2022 By Hezel Dalimoos

Setting up Deduper Query in Altru

1. Log in to Altru
2. Click on Analysis
3. Click on Information Library
4. Click on Add an ad-hoc query
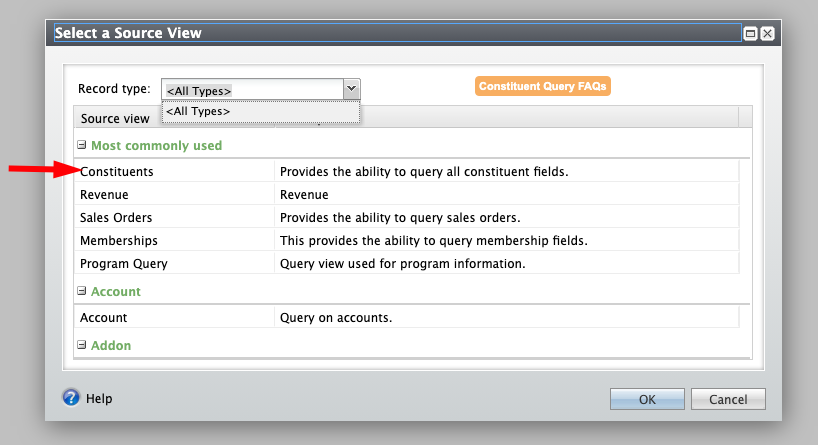
5. Click on Constituents, it will highlight
6. Click on Ok
7. Remove the Name from the Results fields to display
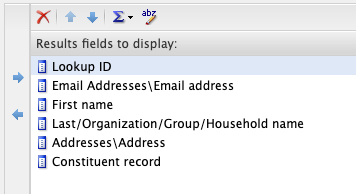
8. Add the following fields to the Results fields to display

Select the fields you would like to dedupe by clicking the arrow pointing right next to the Result fields to display

  1. Constituent > First Name (optional)
  2. Constituent > Last/Organization/Group/Household name (optional)
  3. Email Addresses > Email address (optional)
  4. Constituent > Lookup ID (optional)
  5. Constituent > Constituent record (required)

9. Make the following restrictions to the query in the Include records where:

  1. Constituent > Member > Membership > Membership ID > Not blank
  2. Email Addresses > Primary email address > Equal To > Yes
  3. Preview your results
    1. Click on the Preview results tab
      If your Preview results return more than 15,000 rows STOP HERE and go to the next section.
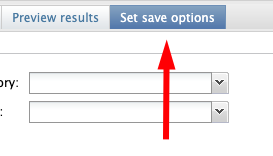
  4. Click on the Set save options
  5. Enter the name of your query: Membership List – Deduper
  6. Click on Save and close
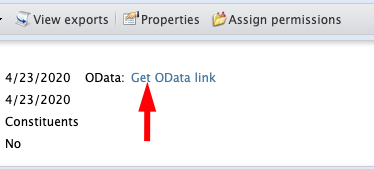
  7. Click on the ‘Get OData link’ link
  8. Click copy the link and paste it to TextEdit or Notepad

More than 15,000 records

If you have more than 15,000 records you will need to create multiple queries.

1. If you came from the previous step click on Save as
2. Fill in Save query as: with Membership List – Deduper
3. Click on Select filter and output options
4. In the ‘Include records where’ you need to add one of the following options:

You will have to keep adjusting dates to get the records below 15,000, this may take some time.

  • Add Constituents > Date added > Before > Specific Date > Pick a day.
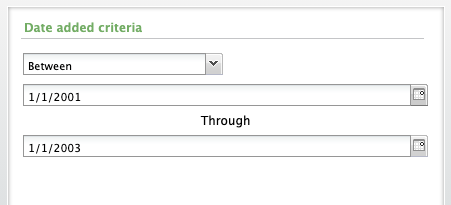
  • Add Constituents > Date added > Between > Pick a day > through > Pick a day.
  • Add Constituents > Date added > After > Specific Date > Pick a day.

In many cases, you will use all three situations. Make sure all dates are covered in your queries. It is best to start with the Before search and build your queries from there. It is important to keep track of your dates or else you may get bad data.

  • Scenario 1 (Two queries required)
    • Before 1/1/2020
    • Between 1/1/2020 through 1/1/2022
    • After 1/1/2022
  • Scenario 2 (Three queries required)
    • Before 1/1/2020
    • On or After 1/1/2020
  • Scenario 3 (Four or more queries required)
    • Before 1/1/2004
    • Between 1/1/2004 – 12/31/2007
    • Between 1/1/2008 – 12/31/2012
    • Between 1/1/2013 – 1/1/2019
    • After 1/1/2019

5. Click on ‘Save as’
6. Fill in Save query as: with Membership List – Deduper – [DETAILS OF THE SEARCH]
example: Membership List – Deduper – Before 1/1/2020
7. Click on the ‘Get OData link’ link for each query that was created
8. Click copy on each link and paste it to TextEdit or Notepad

Create your Deduper with Social Good Software

1. Log in to Social Good Software
2. Click on Apps
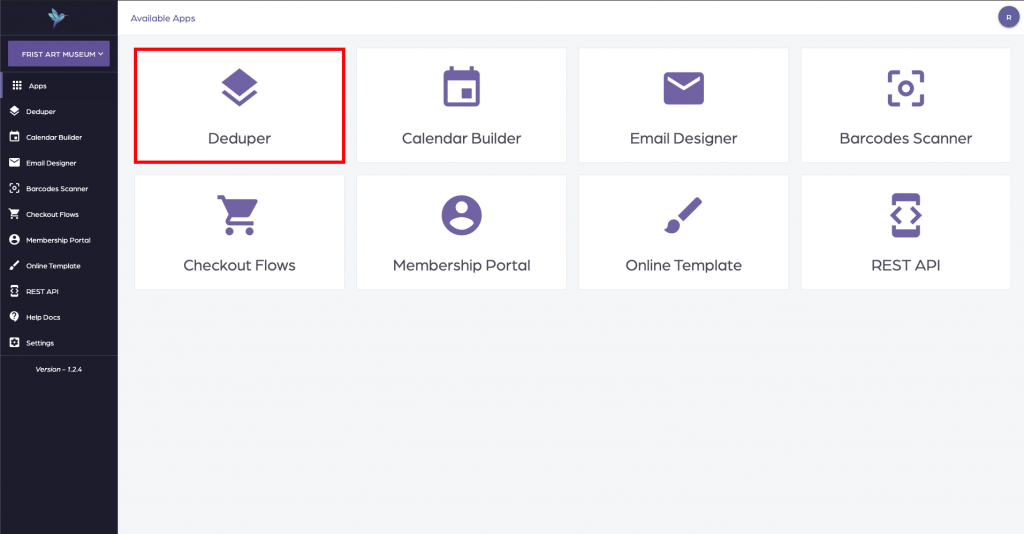
3. Click on Deduper
4. Click on Create Deduper
5. Enter the name of the query (Membership List – Deduper) and click on Next
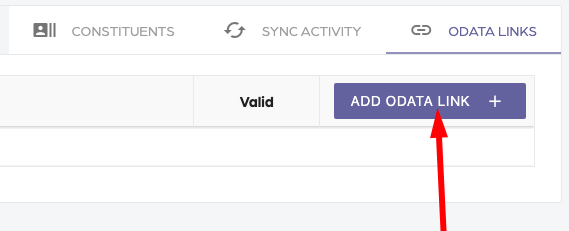
6. Click on Add ODATA link
7. Enter the URL from Altru and click on Next

If had more than 15,000 results and had to break up the queries, this is where you will add all the ODATA links related to that query. Repeat the previous two steps for all additional queries associated with this action.

8. Click on Next
9. Deduping Keys

These are the criteria you will use to find possible matches. This is an “AND” function meaning they have to meet all of the requirements to be matched.

  1. First name > Enabled (recomended)
  2. Last/Organization/Group/Household name > Enabled (recommended)
  3. Email AddressesEmail address > Enabled (recommended)

10. Click on Next
11. Select the System Record ID and click on Next

This is required to merge or delete.

12. Exclude records with the same value
*This allows you to exclude certain criteria, most likely you will leave this blank *

13. Click on Next
14. Click Create Deduper

Settings

  1. Click on Deduper you created
  2. Settings (right side of the main page)
    1. Check to see if the settings are correct.

Start Deduping

1. Click Constituents

This should auto-populate, but you may need to click on Find Duplicates or Sync Activity to update the records. The list will be sorted by the largest number of duplicates.

**WARNING: Read the following options before choosing which method you will use. Each option has its benefits. For more information on which option to use check out the FAQ document here: https://help.socialgoodsoftware.com/article/2479-faq-for-duplicates **

Removing Duplicates

1. Merging records

  1. Click on the Duplicate Record
  2. Click on View Record on all records to determine which account you want to make the “primary”.
  3. Click Merge Records
    • If you get the “Merge Configuration Missing” error it is because you don’t have the Development Data Entry settings in your Altru account.
  4. Set the Source Record
    • This is the non-primary record.
  5. Set the Source Record Action for this record
  6. Set the Destination Record
    • This is the primary record.
  7. Click Merge Records
    • Merging can take a while.

2. Deleting Email

  1. Click on the Duplicate Record
  2. Click on View Record on all records to determine which account you want to make the “primary”.
    1. For the non-primary accounts, if you want to delete the email, click ‘Delete email’.
    2. Remove Email Address.
  3. Ensure Email Addresses/Email address is selected
  4. Click Next
  5. Removal of Email Address Process
    1. This pop-up will walk you through what is happening on the back end to remove the email address from that record.
  6. Check the box “I agree to the steps above and have made a backup.”
  7. Click Remove email address

3. To see the records being removed:

  1. Click Sync Activity
  2. Click Request Data
  3. Click Constituents

Filed Under: Deduper, Help Center, Implementation

How to merge two records together with Altru using the Deduper

September 8, 2021 By Rick Hernandez

The Deduper application is a powerful application for managing records in your constituent database and removing duplicate records that it sees. As you continue to use it, you can see many tools at your disposal to view different records in depth, compare different values, and run many scenarios to clean and manage your database better. Of course, the application only works if you understand how to merge records, delete records, and ensure everything is working with Altru. So, how do we merge records in the Deduper, and does it run everything with Altru in real time?

Steps to Merge Two Records Together

  1. View Record. At this step, we are assuming that you have built the query in Altru already. With this in mind, click on “Sync Activity,” and then click on “Find Duplicates” in the Constituents tab; this will show your duplicate records, and allow you to view any one of those accordingly. Click on the duplicate record you want to view and potentially merge.
Example of viewing a duplicate record in Deduper to merge two records together
Example of viewing a duplicate record in Deduper
  1. Review and Click “Merge Records.” After looking at the two different records, you can see the records may have the same name and email address. The only things that differ include the order count and the date the database created the constituent. If you are confident these records are the same person, locate the “Merge Records” button on the top right corner.
  2. Click “Merge Records” again. Depending on your internet connection speed, the number of records in your database, and so on, the merging process may take a few minutes to complete. You will be notified as soon as the merge process is completed.
  3. “Sync Activity” and “Find Duplicates” again. If the number of duplicate records goes down, you will know that everything is working correctly. If any issues arise, please contact support.

Summary

Using the Deduper to merge records will help clean your database even further than Altru could, saving you time and giving your database administrator peace of mind. As always, please contact us if you have any further questions on how to use the deduper!

Filed Under: Data Merge, Deduper, Help Center

Detaching emails from constituent records process

August 25, 2021 By Rick Hernandez

Introduction

One of the powerful tools built into the Deduper has the function of detaching emails from constituent records so the records are concise and cleaner. Sometimes, constituents have multiple emails or a different primary email, and it may be difficult to decipher which email is better to utilize in the constituent record. Going through the following logical process will help you determine the best email to choose.

Process of Detaching Emails

The Deduper Detaching Process from Data Imports is very useful as it help automate the overall process of detaching emails. Using the Download option after finding duplicates, check the box that says “Automatically mark as Detach.” Upload the data but make sure to review the file in Excel first to see if you are satisfy with the emails that about to be detached.

Step 1: Grab System Record ID and Primary Email Address.

  • We start by reading the first row from the spreadsheet to get the System Record ID of the constituent.
  • Create a query in Altru with the System Record ID to get all the email addresses found on the record:
    • If there are no email addresses found no need to remove anything. The process ends.
    • If at least one email address is found the  process continue.
  • We get the primary email address attached to the record and compare it to the one in the spreadsheet
    • Convert both emails to lowercase and compare.
    • If the emails are not the same the process ends and no email is detach.
    • If they are the same the process continues 

Step 2: Detaching emails with attached Sales Orders

  • If found no sales orders:
    • We check if we have multiple email addresses
      • If found more than one email address:
        • We look for a non primary email address and set it as the primary email address then the process continue.
      • If found only one email address, the process continue.
    • The email is detach from constituents record and the process ends.
  • If there are sales orders:
    • We get all the delivery email addresses
      • Compare each delivery email address with the primary email address
      • If the email address is the same as the primary email address its saved
        • We also store the Lookup of the sales order to restore data if needed
      • If the email address is not the same as the primary email address its ignored
    • We get all the sales orders who match the primary email address
      • If there’s no sales orders found
        • We check if constituent has multiple email address
          • If more than one email address
            • We set a non primary email as the primary email
            • We remove the attached email address and process ends
          • If there’s one email address found
            • We remove the attached email address and process ends.
      • If there are sales orders:
        • We remove the delivery email address from each sales order
          • We store the lookup ID for each order as a backup
        • Again, we check if constituent has more than one email address
          • If more than one email address
            • We set a non primary email as the primary email
            • We remove the attached email address and the process will ends.
          • If found just one email address:
            • We remove the attached email address and process ends

Summary

By seeing the logic behind what the Deduper does in detaching email addresses, you can see how the process helps clean constituent records and help run your Altru database more organized and efficient. If you have any more questions about the Deduper and how it works, please contact us!

Filed Under: Data Merge, Deduper, Help Center

How to prevent duplicate emails when creating household records

July 8, 2021 By Rick Hernandez

Uncheck the Copy email address to household and members option

Filed Under: Data Merge, Deduper, Help Center

How to automatically determine who the email address belongs to

June 7, 2021 By Rick Hernandez

Learn how to automatically determine who the email address belongs to with your Altru data.

Filed Under: Deduper, Email, Help Center

FAQ for duplicates

April 19, 2021 By Rick Hernandez

How can I automatically detach an email address from a record with sales orders attached?

To remove an email address from a constituent record you can use the Deduper tool to safely detach the email address from the constituent and the sales orders. WARNING: This process will remove the email address from the constituent and any sales orders associated with the email. Please make sure you have appropriate backups.

We have attached the same email address to all household members, what should we do moving forward?

We need every constituent on file to have just one primary email address and not allow records to share email addresses. You will need to remove the step of “Attaching” the same email address across all household members from your regular process.

A husband and wife share the same email address, how should we handle this case?

View Walkthrough

You need to remove the email address from the husband or wife to only have one email address on record. The second option is to remove the email address from both constituent records and add it to the household.

When you detach an email address from a constituent, does this also remove the membership?

No, if you detach an email address from a constituent the membership will remain attached to the constituent. The constituent record will be left without an email address without modifying the membership.

I’m missing email addresses for constituents, how can I source new email addresses for my constituents?

You have two options for getting email addresses. You can explicitly ask for them using an email with the Email Designer and then have those emails entered manually into Altru. You can also implicitly get email addresses using data enrichment services. Blackbaud offers such a service, but there are also other vendors in the marketplace offering such services to source email addresses. WARNING: Implicitly sourcing email addresses do not give you the right to email them unless permission is granted from the constituent.

How to prevent duplicates in the future?

When manually inputting a new record make sure you search for a constituent in three different ways. For example, First Name and Last Name, Email Address, and Phone Number. Create a standard operating procedure when creating new records to always require First Name, Last Name, Email, and Phone. Keep your data up to date with Deceased Record Finder, Address Finder, and Email Finder.

Filed Under: Data Merge, Deduper, Help Center

How to remove an email address

June 15, 2020 By Rick Hernandez

Step 1) Login to Social Good Software

Filed Under: Deduper, Email, Help Center

How to remove duplicate email from membership in Altru

May 3, 2020 By Rick Hernandez

Filed Under: Data Merge, Deduper, Help Center

How to set up ODATA links with Deduper

April 27, 2020 By Rick Hernandez

The Deduper application requires a data source to be able to dedupe data. You will need to first create ODATA Links before you can start using the application. If you have not already done so you can start with the following guide.

How to create Deduping Query with Altru

Step 1: Login into your Social Good Software account and click on the deduper application.

Login to application

Deduper

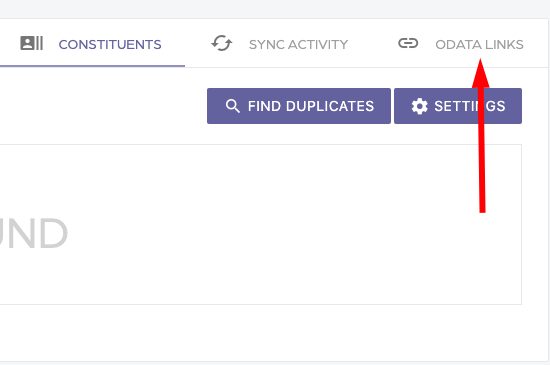
Once you have clicked on the deduper application click on the ODATA Links navigation item on the top right hand side menu.

ODATA Links

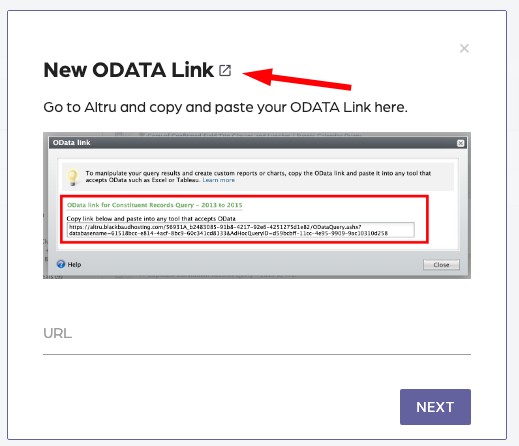
Then you will see the option to add an ODATA link. Click on the plus option to create a new link with Altru.

Add ODATA Links

You will get a dialog asking you for an ODATA link since you already have created the ODATA links go ahead and add all the links to the Deduper application. 

You can do this by logging into Altru and going to the information library and looking for the links you created. Once you find each of the links just click on the “Get OData link” and copy and paste the link into the Deduper application.

Get an ODATA Link

Each of the links will be validated with Altru just to make sure you don’t make any mistakes as you copy and paste the links into the input box. Please be patient as this can take up to 90 seconds to complete per link.

Validating Link

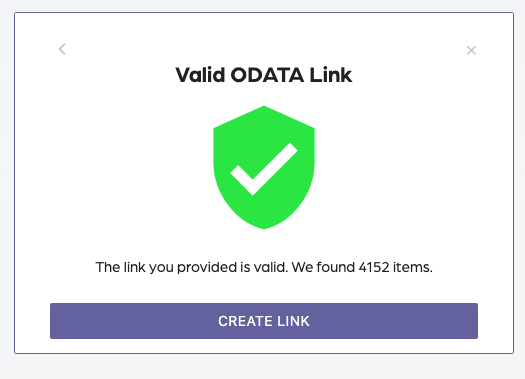
Once the validation is complete you will get a success message letting you know the link is valid.

Valid Link

Repeat the same process for the rest of the ODATA links.

Step 2: Sync data from Altru

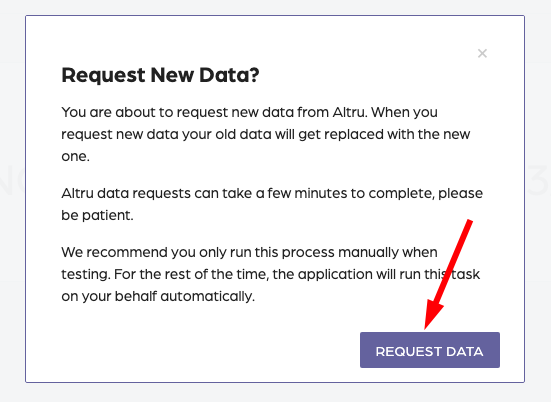
Once you have all your ODATA links setup the next step is to download data from Altru to dedupe it. Click on the Sync Activity tab and then click on the Request Data Button.

Request Data

This process typically takes 5-10 minutes to sync data from Altru. Give it a few minutes to download the data before you move to the next step.

Step 3: Setup the Deduping key

Click on the Constituents tab to set up the deduping key.

Click on Constituents

Then click on the settings button, this will bring up a dialog to set up the unique identifier key.

Click on Settings

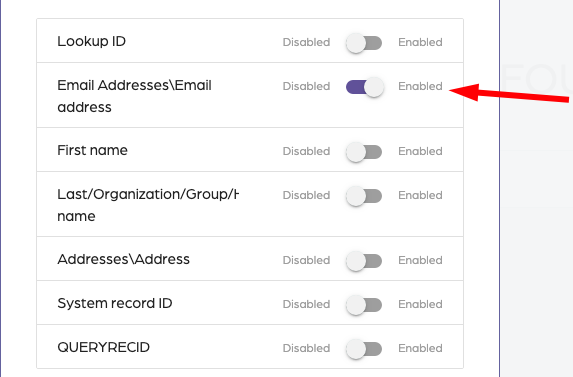
Deduping Key – The deduping key is used to find duplicate records in your data. In our example we will be using Email.

Select the Email Address field
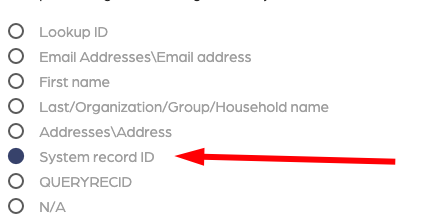
Select the System Record Id

Once you have setup both the Deduping Key and the System Record Id you will be able to run the deduping process. Click on the save button to save your settings.

Save the settings

Step 4: Find duplicates in dataset

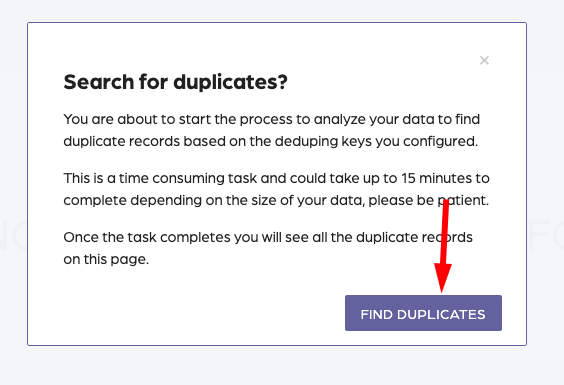
Click on the “Find Duplicates” button to find duplicates in your data.

This will bring up a dialog letting you know that this process could take up to 15 minutes.

Click on Find Duplicates

This will schedule a task to find duplicates in your data. Please be patient as this is a time consuming task.

Filed Under: Deduper, ODATA

How to create deduping Query with Altru

April 27, 2020 By Rick Hernandez

The Deduper application requires a data source to be able to dedupe data. Typically this is a query that outputs the data you want to dedupe. In this short guide, we will be walking you through the process of creating a simple query to find duplicates.

Remember this query can be any query you want to process for duplicates. For this example, we will be deduping our entire database, but you can choose which data to dedupe depending on how you set up your data source.

Step 1: Login into your Social Good Software account and click on the deduper application.

Login to application

SGS – Deduper

Once you have clicked on the deduper application click on the ODATA Links navigation item on the top right hand side menu.

ODATA Links

Then you will see the option to add an ODATA link. Click on the plus option to create a new link with Altru.

Add ODATA Link

You will get a dialog asking you for an ODATA link since we don’t yet have the link. We will click on the external icon to open the Altru information library directly.

Altru Information Library

Step 2: Create a De-duping query

Clicking on the link will open a new tab with the information library in Altru. Click on the “Add an ad-hoc query” option on the top left-hand side navigation.

Ad-hoc Query

This will bring up the option to create a query. We are going to be creating a Constituent query to dedupe constituents.

Note: If you want to dedupe other data types select the right query type, for example, sales query.

Creating query type with Altru

Now it’s time to create the query based on our query restrictions.

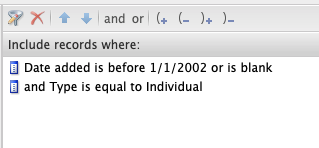
Restrictions

Let’s review each restriction one at a time.

The type is equal to individual – We only want to dedupe individual records at this time. If you want to dedupe other types such as organizations create a separate query and process those independently from this query.

Date added is before DATE or is blank – Altru has a restriction to only be able to output 15,000 rows at a time with ODATA links. Because of this restriction, we have to create multiple queries. You want to create a query that outputs less than 15,000 rows. In our example, it’s any record created before 1/1/2002. Keep in mind this could be different for your organization.

Let’s now setup the output display fields

Output Fields

Let’s review each output field one at a time.

Lookup ID – Quick handy way to view if the record is a duplicate by just seeing the ID.

Email Address – Easily see if the email can provide a contextual action

First name – View the first name

Last name – View the last name

Address – View the address

Constituent record – We need this to be able to merge records together

WARNING: The Deduper only works with one type of column. Meaning you can’t have two columns that are the same such as Date changed, Lookup ID, etc.

Now click on the Preview Tab on the top navigation.

Preview tab in Altru

You will want to make sure the total result is less than 15,000 rows.

Don’t worry about not having all the records in this query, we will come back and create more queries for the rest of the records. Once you are happy with the output click on the “Set save options”

Save option with Altru

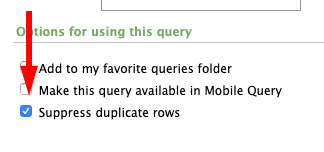
Make sure you check the “Suppress duplicate rows” checkbox. Don’t worry if you see multiple rows the Deduper application knows how to deal with duplicates.

Suppress duplicate rows

Double check the output of the query is less than 15,000 rows.

Output of query

If you see more than 15,000 rows go back and adjust the date to output less than 15,000 rows.

Once you have verified you have less than 15,000 rows then name and save your query.

Name: Duplicate Constituent Records Query (BOT – 2002)
Description: Query to output records created from the beginning of time to 01/01/2002

Save and close

Step 3: Duplicate Query with revised dates

Once you have your query created, duplicate the query and adjust the dates for the next 15,000 rows in your database by clicking on the copy button.

Copy query

This will bring up a screen identical to the creation query screen. You will have to change the date range selection and rename the query to reflect the new dates. Select the date restriction and use the Between operator to select two date ranges.

Between two dates

You might be able to select more years depending on the output. For example, if your output is only a few hundred rows you can select a wider range of dates. If you are getting too many rows, you might have to restrict the date range between months and years.

Click on the “Set save options” and save your query by changing the name

Save new name for query

Name: Duplicate Constituent Records Query (2002 – 2003)

Description: Query to output records created from 01/01/2002 to 01/01/2003

At this point, you will want to repeat the process in step three until you have done your entire database. This will equal a group of queries. Here is how the process works.

Create queries for output

You will end up with a group of queries. You now have the ODATA queries required for the Deduper application. You can now at this point follow the guide on “How to set up ODATA links with Deduper”.

Filed Under: Deduper, Help Center, Query Example

Social Good Software | Altru software integrations | Deduper | Calendar Builder | Email Designer | Barcodes Reader | Checkout Flows | Membership Portal | Online Template | API Integrations