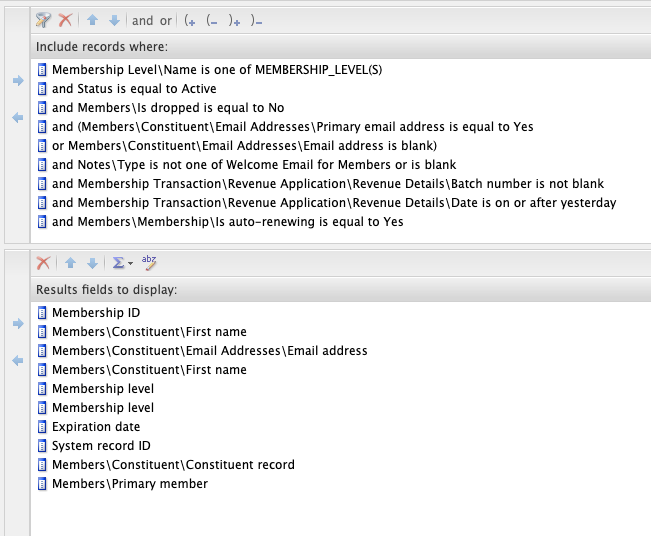
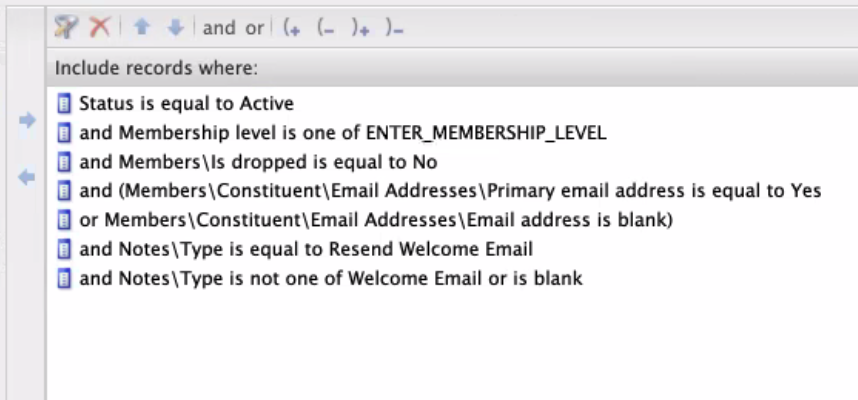
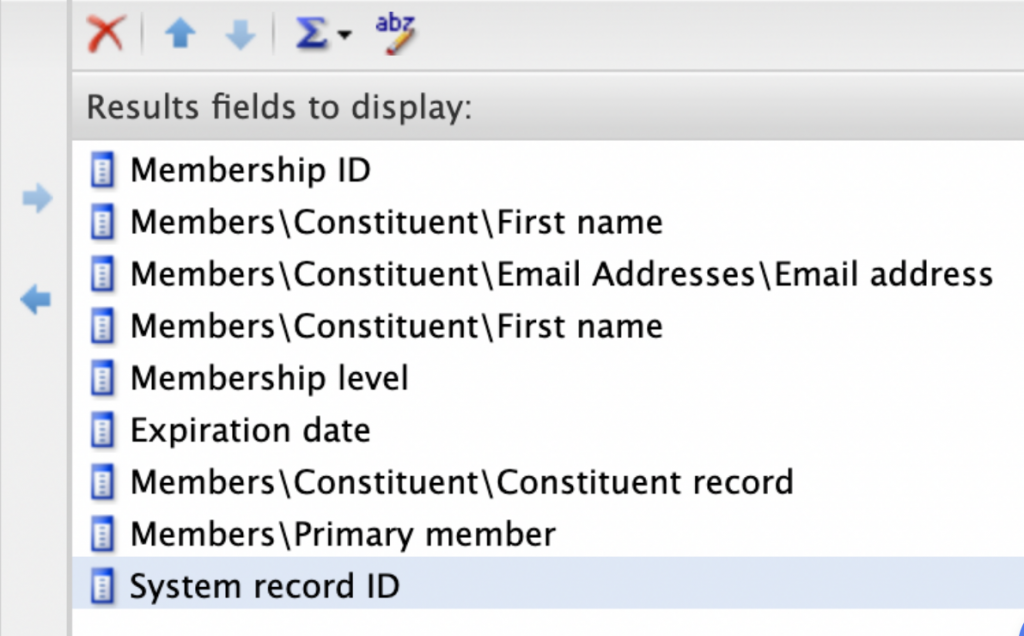
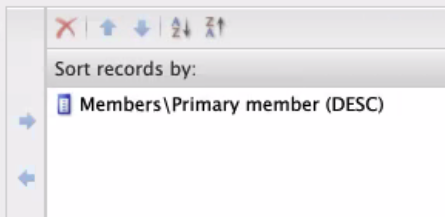
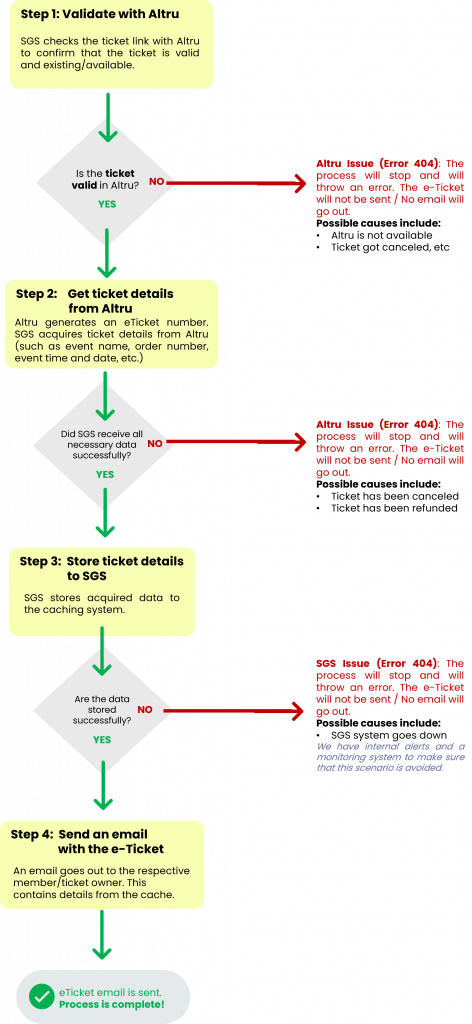
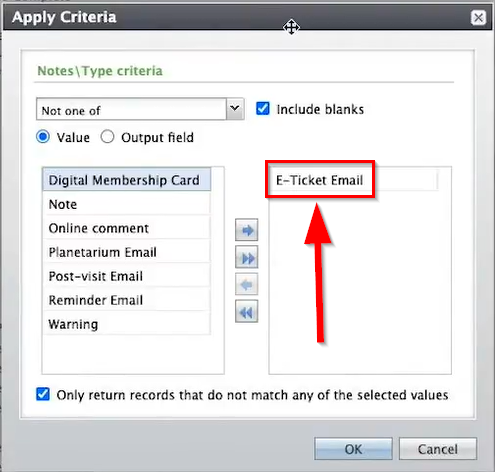
It is very useful to create a membership Note Type for your queries. You can utilize it for any queries like manual tagging, sending emails for batch orders, and sending emails for advance, daily, and online sales.
Steps to create a membership Note Type
1: Go to your Altru account and click on Administration.

2: Proceed to Code Tables

3: Under Code Tables, click on Filters. On the drop-down menu, select Membership and click on Apply. It will then bring you to the list of Membership categories for the Code Tables.

4: Click on the Membership Note Type.

5: On the Membership Note Type Table Entries, you need to click the Add button.

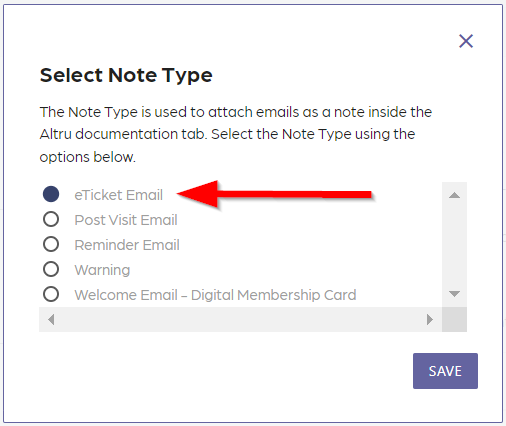
6: After clicking the Add button, a dialog box will appear where you can write down the kind of Note Type you are creating. Click OK.

7: Well done! You now have your Note Type. Add more by clicking the Add button and doing the same process.

You can also check the guide on how to create a SYNC Operations note type to learn more about creating a note type.
Please reach us through our support channel if you have questions or clarifications. We are always happy to help!