• Skip to primary navigation
  • Skip to main content

Social Good Software

Creating amazing guest experiences through innovative software solutions for the social good community

  • Features
    • Deduper
    • Calendar Builder
    • Email Designer
    • Barcodes Scanner
    • Online Template
    • Checkout Flows
    • Membership Portal
    • Data Bridge
  • Pricing
  • Contact
    • About
    • Contact
    • Careers
  • Login
  • Get Price

Altru

How to create a query for mail provider using Altru

December 9, 2021 By Rick Hernandez

Introduction

Below is a detailed process of creating a list that can sync over to either Constant Contact or Mailchimp. Take note that you will undergo the same process of creating a list of individuals whether you are using Constant Contact or Mailchimp and whether it is the main list or a sub-list. Make sure to include all the recommended information whenever you create a query for a mail provider.

The process starts by creating an attribute needed for the query and then going through the process of creating the query itself. Refer below to fully understand the process and to know what are  the needed information:

Process of creating an Attribute

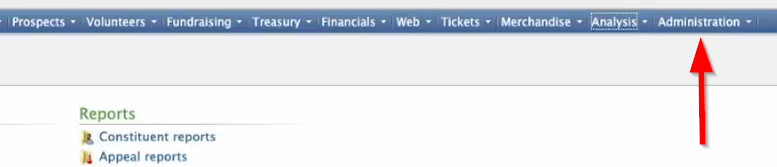
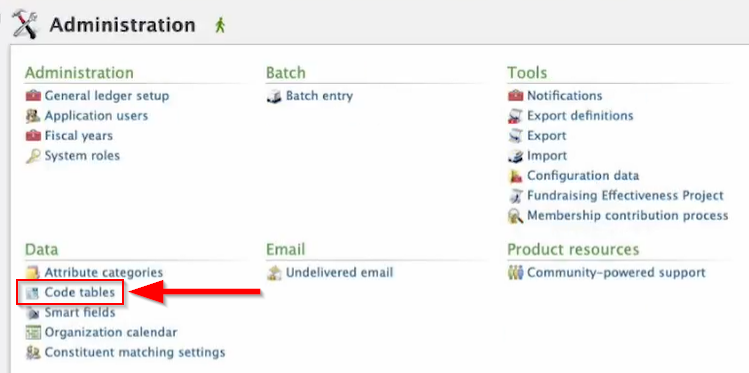
1: Go to Altru and click on Administration then proceed to Attribute Categories.

2: Click Add which will prompt you to a dialog box.

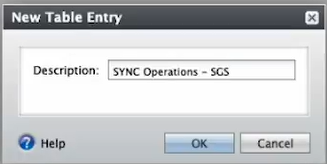
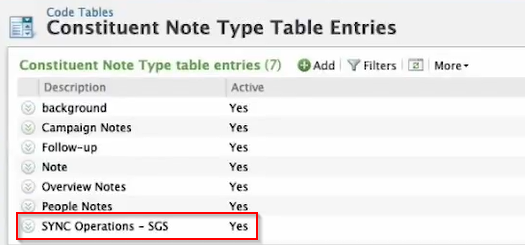
3: Make sure to create a category for a specific segment and if you have a sub-list then you need to tag it differently. Supply the needed information in the Dialog Box based on the details below before you click Save.

Name: Base it on the particular segment you are working on
Record type: Constituent
Data Type: Yes/No
Make sure to ✅ Allow only one per record.

Note: You can add sub-lists as you want which is based on the main list but it still needs to undergo the same process above.

Steps on how to create a query for mail provider in Altru

1: After creating the Attribute, you can now proceed to Analysis and click on the Information Library.

query for mail provider

2: Click on Add an ad-hoc query which will redirect you to another Dialog Box.

query for mail provider

3: Select Constituents then click OK.

query for mail provider

4: You can now add fields to your query. Below are the recommended fields needed to make the syncing of information with Mailchimp or Constant Contact work. Just note that if you have a segment that you want to create, all you have to do is to follow the same process but make sure to include the specific segment you are working with. 

query for mail provider

Note: You can rearrange the fields based on your preference.

5: Click on the Set save option to name your query, write a description, select its category and designate a folder then Save and close.

query for mail provider

6: Great! You have officially created a query. You can now use the OData Link with the Data Bridge. 

query for mail provider

Adding Sub-list to the current query for a mail provider

To add a specific segment to your query, you need to go through the same process and add the particular segment you want to include. You can also go to Edit Definition if you already have an existing query and add the specific segment.

1: Go to Edit Definition and proceed to Attributes. 

query for mail provider

2: Double click the sublist that you want to include.

3: Select Value before dragging it to the Results field to display.

4: Lastly, add the logic applicable for your sublist.

query for mail provider

You now have your attribute and a query for your mail provider. If you have more questions please reach out to us through our support channel.

Filed Under: Altru, Data Bridge, Help Center

How to create an unsubscribed attribute with Altru

November 1, 2021 By Rick Hernandez

Introduction

To determine those individuals who unsubscribed, you just need to create an unsubscribed attribute with Altru. Do it once and it will be shared among all of your lists of members.

Steps on how to create unsubscribed attribute with Altru:

1: Open ALTRU and click ADMINISTRATION.

unsubscribed attribute with Altru

2: Proceed to ATTRIBUTE CATEGORIES under Data

unsubscribed attribute with Altru

3: Click ADD to create new attribute.

unsubscribed attribute with Altru

4: A dialog box will pop out. Input the following and click Save.
Name: Unsubscribed
Record type: Constituent
Attribute group: N/A
Data Type: Yes/No
Note: Make sure to click on the ‘Allow only one per record’ checkbox.

Once done with the steps above, you can now connect it all together with the Data Bridge which is very useful in attaching those unsubscribe attributes.

If you have more questions, please reach out to us through our support channel.

You can also check the tutorial on How to create an attribute for a segment with Altru.

Filed Under: Altru, Data Bridge, Help Center

How to create an attribute for a segment with Altru

November 1, 2021 By Rick Hernandez

Introduction

If you have lists of constituents in Altru, you also need to create an attribute for that segment. Every list must have an attribute assigned to it. Attributes are useful when you send an email and you only want those individuals who belong to a particular group to receive your message.

Things to consider when you name an attribute for a segment:

  1. Who those individuals are.
  2. What group they belong; and
  3. It must be readable and maintainable in the future.

Steps on how to create an attribute for a segment with Altru:

1: Open ALTRU and click ADMINISTRATION.

2: Proceed to ATTRIBUTE CATEGORIES under Data.

3: Click ADD to create a new attribute.

4: A dialog box will pop out where you need to supply the needed information. Click on Save.
Name: (best describe the list)
Record type: Constituent
Attribute group: None
Data Type: Yes/No
Note: Make sure to click on the ‘Allow only one per record’ checkbox.

create an attribute for a segment

Create an additional attribute by repeating the process from step three then provide the needed information.

Summary

Creating an attribute is needed if you have lists of individuals who belong to a particular group. It is helpful to your organization because you can use this list for your marketing campaign. Sending emails to your target group of people will be a lot easier and faster when you have your attribute.

If you have more questions, please reach out to us through our support channel.

You can also learn how to create an attribute for your email list. And, we also provide a guide on how to create an unsubscribe attribute.

Filed Under: Altru, Data Bridge, Help Center

How to create a SYNC Operations note type

November 1, 2021 By Rick Hernandez

Introduction

Learning how to create a sync operations note type in Altru is beneficial to your organization because it helps record the operations that happened in particular constituent information. It is useful as it gives the history of all the operations done on a particular record. 

Whenever the organization’s data sync, you will be able to determine what operation took place, updated, and moved over in a certain constituent record. With note type, you will be able to see all the operations that happened on a particular constituent record.

Steps to create a SYNC Operations note type

1: Open ALTRU and click ADMINISTRATION.

How to create a note type

2: Proceed to CODE TABLES under Data

create a sync operations note type

3: Click on FILTER then the DROP-DOWN MENU

create a sync operations note type

4: Select BIOGRAPHICAL and click APPLY

create a sync operations note type

5: It will show a list of biographical types that can be set up. Click on CONSTITUENT NOTE TYPE then ADD.

How to create a note type

6: A dialog box will pop out. Add a name to the description area for a new note type then click OK.

create a sync operations note type

Summary

You now have a newly created note type that you need to add to a particular constituent record. This will make sure that every time you perform a data sync, it will be easier to query and simpler to check the operations previously done. Note type is also useful for data restoration since it contains the original information for previous data syncs.

You can also check the tutorial on how to create a membership note type and how to create a custom note type with Altru.

If you still have questions or need clarifications, please reach us at support@socialgoodsoftware.com.

Filed Under: Altru, Data Bridge, Help Center

Social Good Software | Altru software integrations | Deduper | Calendar Builder | Email Designer | Barcodes Reader | Checkout Flows | Membership Portal | Online Template | API Integrations