Creating amazing guest experiences through innovative software solutions for the social good community
Scanning tickets and memberships using the SGS Barcode Scanner will make your work easier and faster. It is an app that you can download to any mobile phone and tablet . You can also download backups of your stats from the scanner for record purposes or to check the result and analyze. This article will guide you on how to download stats for barcode scanners which also applies to any scanner you have set up.
1: Go to your Social Good Software account
2: Proceed to Barcode Scanner then click the scanner that you want to download its stat.

3: Click on STATS located at the left side of the window.

S4: On the bottom part lies two options on how you want the data to be downloaded. You can download it as a CSV file or in Excel/Spreadsheet format.

Sample of Stat downloaded in CSV format:

Sample of Stat downloaded in Spreadsheet format:

Step 4: You can also choose a date and then the app will provide you all the data from the date you selected down the first day you use the Barcode Scanner. Click either CSV or Spreadsheet to download the data based on the selected format. If you need data from a particular date, we recommend just deleting the data you don’t need.


Note: The downloading option will download everything that was stored in it from the latest date you use the scanner or the date you selected to the first day you started using the Barcode scanner.
To help you with any Altru related works and issues like query building, backing-up an existing Altru theme and other administrative tasks that you need help with, it is necessary to first add an SGS team member to Altru. With the access given, our team will be able to go in into your Altru account and work on your behalf.
Follow this guide below to add an SGS team member to your Altru account.
1: Go to your Altru account and click Administration then proceed to Application User.

2: Click on the Add button and a dialog box will pop out.

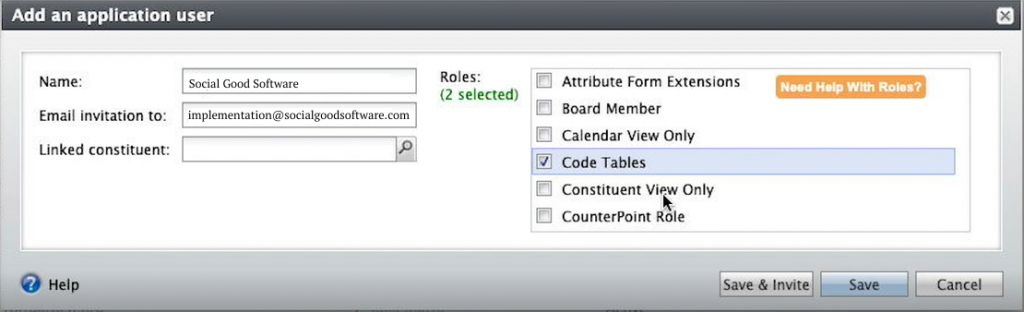
3: Supply the needed information and select specific roles for the SGS member you are adding:
Name: Assigned SGS member
Email invitation to Assigned SGS member’s email address
Roles of an added SGS team member to Altru:
4: You can click on Save & Invite after setting up a new user. The added SGS member to your Altru account will receive an official invite through email which will give her permission to do some work on your behalf.

To ensure that the implementation process will go smoother with your organization, we compiled a series of frequently asked questions (FAQ) we have received from our clients about Digital Membership Cards to guide you.
Learn more about setting up your Digital Membership Card with these Frequently Ask Questions (FAQ):


Enable your price types with Altru to help encourage your members and guests to avail of your tickets online. Ticket price is one of the information they want to know before they decide to buy, so see to it that you enable the setting for particular ticket types to make the price available online.
1. Go to your Altru account, then proceed to Tickets.

2. Under Configuration, click Sales methods.

3. Select Online Sales.

4. Proceed to the Price Types tab.

5. Select the price type you want to enable, then click Allow price type.

Your ticket price is now available on your Online Sales. Try this if you have trouble with your web forms to be able to show your price type online.
Please reach us through support@socialgoodsoftware.com if you have questions or need clarification on this topic. We are always happy to help!
Calendar Builder of Social Good Software is a tool designed to create calendars from Altru data. It is useful in creating calendars for time ticketing, school programs, and special events. Learn how to add additional programs to your calendar and make necessary adjustments using the Altru query and enjoy the benefit it can bring to you and to your organization.
1: Go to your Social Good Software account.
2: Proceed to Calendar Builder and click on the existing calendar where you want to add events.

1: Go to Settings and click the query for Timed Ticketing under Events to start and make necessary adjustments.

2: It will redirect you to Altru’s Ad-hoc Query wherein you need to click Edit Definition.

3: You can now enter the program that you want to add to your query:


1: Go back to Calendar Builder. Click on the other query under Reserved Events. This query will show you if the event tickets were sold out or not.

2: Same with the first query, just click the link which will prompt you to Altru’s Ad-hoc Query where you need to click the Edit Definition.


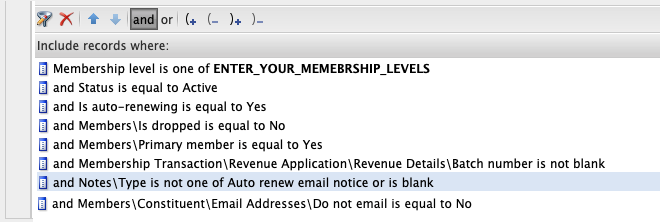
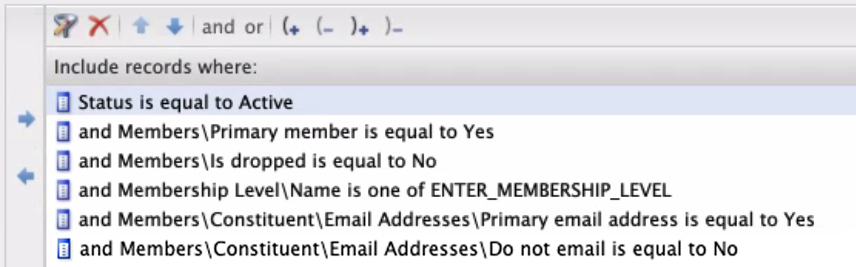
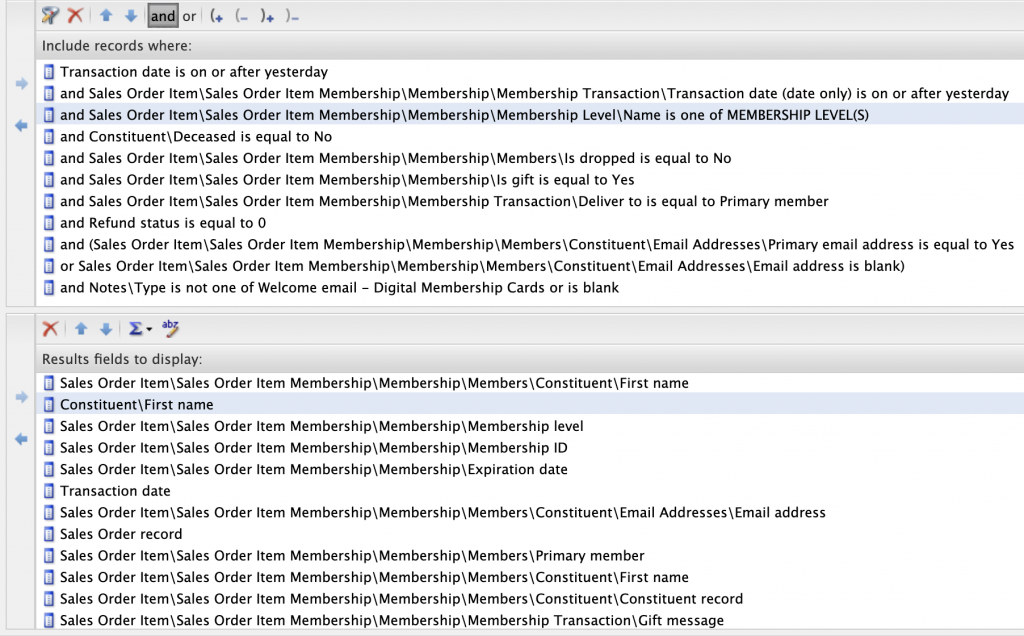
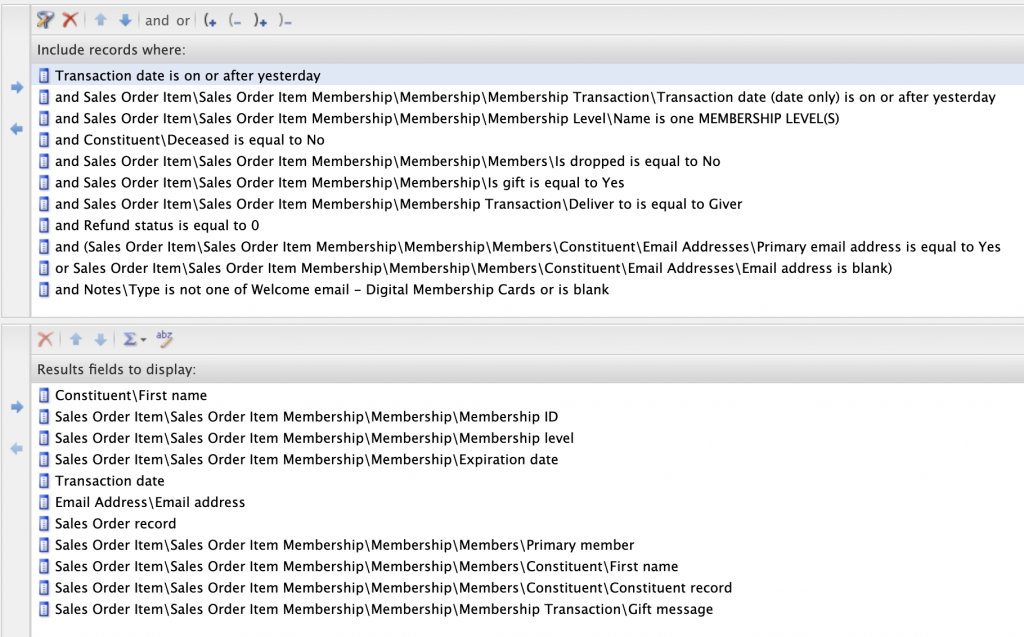
Under Include records where:
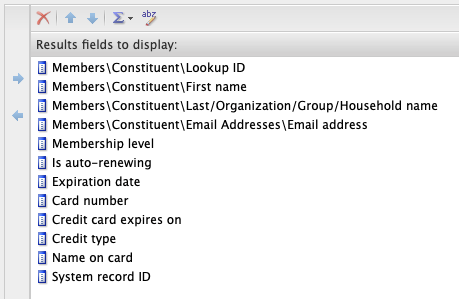
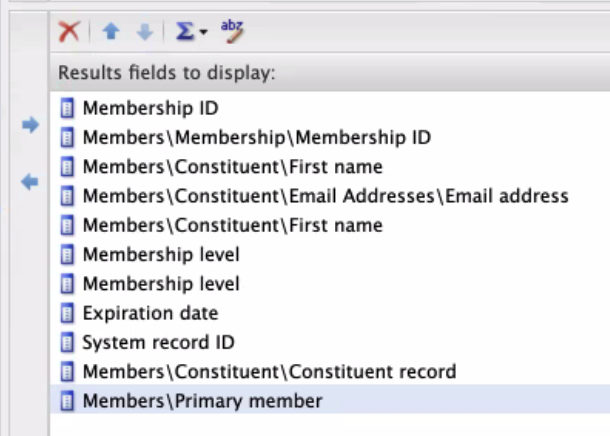
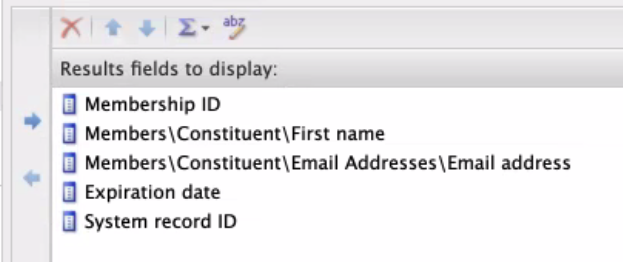
Under Results fields to display
1: Back to Calendar Builder. Go to Sync Activity and click on Request Data then another Request Data on the dialog box. This will sync over all the information based on the recently made query into our calendar.


2: Once it’s done syncing, proceed to Settings then click on the gear icon and select COUNT(Sales Order Item Ticket\Tickets\Status) before you click Save.


3: Click Preview to check your output. From here, your calendar will automatically update on your website if you have it embedded. We ask for your patience when doing this because it takes a minute or two before it reflects on your site.
If you have more questions please reach out to us through our support channel.