August 25, 2022
Help Center
How to add digital membership cards to your email
Requirements:
- You have an email created in Social Good Software.
- You have written a query for your email that include these two (2) required fields:
- Members\Constituents\First name
- Members\Constituents\Constituents Record.

Note: There are two first names in the output fields because the first one is for the body of the email and the other one is for the linked digital membership card.
Adding digital membership cards to your email
1: Go to the Email Designer. Click on the email template you prepared and proceed to Settings.
2: In Settings, you need to set up the Required and Customizations sections properly. Make sure each item has a green check next to them cause it indicates that you have already configured it correctly.

3: To create the digital membership card link, first, click on the little gear in the Grouped Fields section and enable the following:
- Members\Constituent\First name
- Members\Constituent\System record ID

4: Proceed to the Grid section for the merge field of the first name and the link to the digital membership card. Select the Grid and click on the Load default for the merge field and the link to show up. Save once done.

5: Save the changes you made in the Settings and proceed to the Designer tab.
6: On the lower left side of the window, click on the Grouped field dropdown. Drag the %grid% into the body of the email and Save.

7: Go to the Preview tab to check the changes made to the email. You can also try the membership card link if it works.


Summary
Grid allows us to create a link to digital membership cards for each member on membership and add it to the email. The email is going to the primary member, so we want to display all the members who are part of that membership. In that way, all members can download their digital membership card.
Contact us through our support channel if you have any questions.
How to handle the delivery of emails, bounced emails, and complaints
Introduction
There are times that when sending out emails with the Email Designer, some of them might get delivered, bounce, or have a complaint filed. It can happen for a few reasons, but the most common is not getting the correct email addresses at the time of purchase with Altru. We recommend that you set up the email validation service with your Altru account and follow this guide on how to handle the delivery of emails, bounced emails, and complaints to manage any email concerns you have accordingly.
Bounce messages
Sending emails through Email Designer is not always perfect. At times it will bounce because of various reasons like invalid email addresses due to typos, the account is no longer active, or an incomplete email address. You can handle bounced emails by following the steps below.
1: Go to your Social Good Software account and proceed to Email Designer.

2: Click on the email template you want to set up and proceed to Settings.

3: Whenever an email bounces, it will go back to the From Email Address with a notification containing details of why the email bounced and other information you might need. You need to monitor the origin of your emails to capture bounce messages and correct them.


4: Click the Resend Email link. It will redirect you to the email you are trying to send to your customers. You can also see the status of your email and information related to it.

5: You can resend the message and correct the recipient’s email address by clicking the Send Email button. A dialog box will pop out where you can type in the correct email address and click Send Email. With this, you will be able to send the email to the appropriate person and correct any mistakes before the message goes out.

6: You can check your recent email sent by going to the Activity tab.

Complaints
There is a chance that your email sent is flagged as spam. It might happen because the recipient did not give their consent to receive this kind of notification, the information is not relevant to the person, or you sent the email to the wrong email address. We recommend doing an email validation before your customers submit their orders. That way, you can avoid delivering the email to the incorrect email address.
Go to the Activity tab to check if the email you sent was delivered. The From Address in your email template will always receive the complaint notification where you can check the complaint details.

Resending email
There are circumstances when customers ask for help because they can’t find their tickets or did not receive a reminder. Learning how to resend an email using the Email Designer will be helpful in this situation.
1: Go to the Activity tab of the Email Designer.

2: Click on the calendar and select the date you sent the email.

3: Do command+F for MAC or Ctrl+F for Windows. Type in the email address you are looking for, and click on Resend Email.

4: another way to resend an email is to go to your query in Altru and remove the note type on the sales order so that it will kick off a new email. Note that if the email address is wrong, it will still be delivered to the incorrect email address.
Note: Only original emails that you sent out are the ones attached to Altru
Summary
We emphasized that you check the origin of your email or the From Email Address. That way, you will know if there are undelivered emails, bounced emails, or complaints and handle them appropriately. Please reach us through our support channel if you have questions or clarifications.
How the relative to date email setting works
Do you have members who auto-renew more than once? Or a monthly membership program that requires an email to go out to members monthly? Keep on reading to learn how to use the relative to date frequency option in your email settings to send the same email on a specific date you want it to be.
If you want to use the relative to date option for an email, you will need a specific date like the date of the membership renewal, the date of purchase, or anything with a date. We recommend that you use the auto-renew query prepared by Social Good Software.
Note that there are many kinds of emails with different purposes based on the needs of an organization, so Social Good Software supports three types of emails.
Email Frequency settings
You can find the Email Frequency settings on the email settings page under the option Frequency. The frequency automatically defaults to sent out immediately.
1. Frequency – Immediately
- This option will send the email immediately after you create it.
- The immediate option requires a note type in the query to know that you sent out an email.
Learn about how to create a note type for a sales order query
2. Frequency – Specific time
- You can set the time when you want your emails to go out.
- Note type is also needed to know that you sent an email at a specified time.
Learn about how to create a note type for a membership query
3. Frequency – Relative to date
- You need to add to the query specifically on the output fields the purchase date, transaction date, expiration date, or another Relative Field.
- This option does not require a note type in the query but needs a date like the renewal date, date of purchase, and so on to send out an email relative to the date.
- A note type is still required in the email settings to create a note in Altru that the email already went out.
Do you need to email the same person multiple times?
Read How to bypass a single email limit per email type.
Summary
Sending emails can be at the very moment, at a specific time, or relative to date. Depending on which frequency option you select, you will either need a note type in the query or a date in the output field.
If you have additional questions, please reach us through support@socialgoodsoftware.com. We are always happy to help!
Auto disable emails when queries change in Altru
- Prevents you from making mistakes with queries which could end up emailing the same person multiple times
- Auto turn off the email for you so you have time to review the changes on the query
- Notify you of the change and to which email the change was made
- View the history of the changes in the SQL using an excel or CSV file
Summary
We recommend temporarily disabling the email before making changes to the query to not receive alerts and so they won’t get turned off automatically. Once disabled, you can modify and review it before re-enabling it again.
How to edit membership portal content
Edit your membership portal content to align it with your organization’s design and style. Follow the steps provided below to know how to modify each page of your portal and add touches based on your organization’s preference.
Steps to edit membership portal content
1: Go to your Social Good Software account.
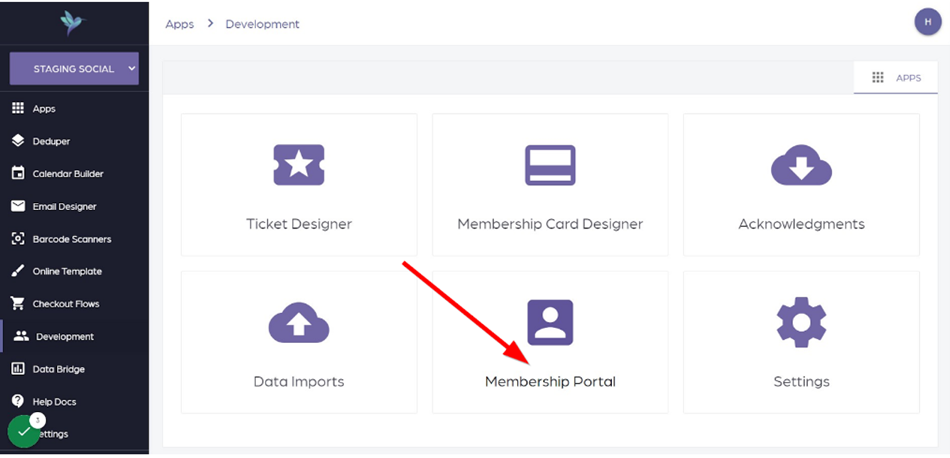
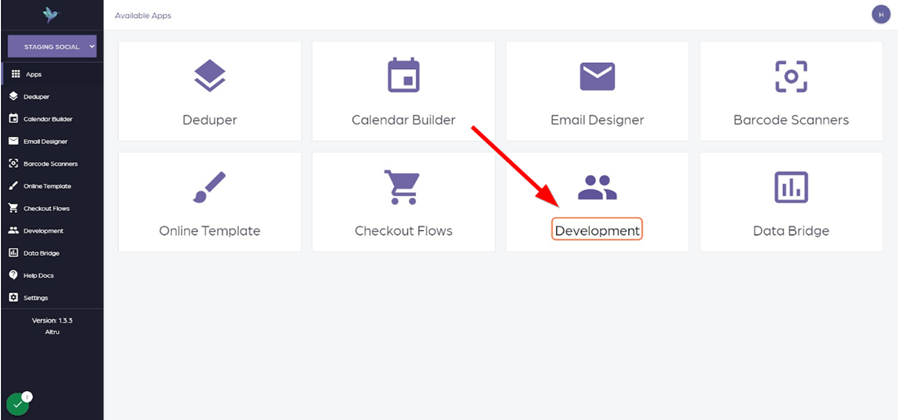
2: Click on Development.
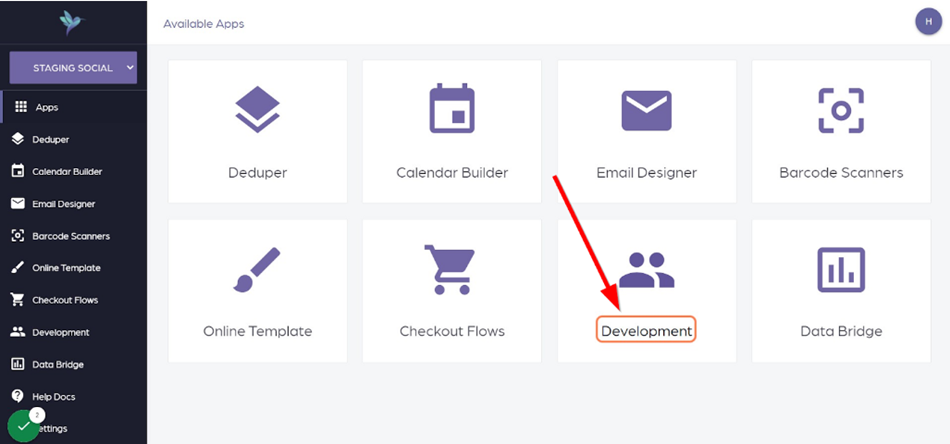
3: Proceed to the Membership Portal.
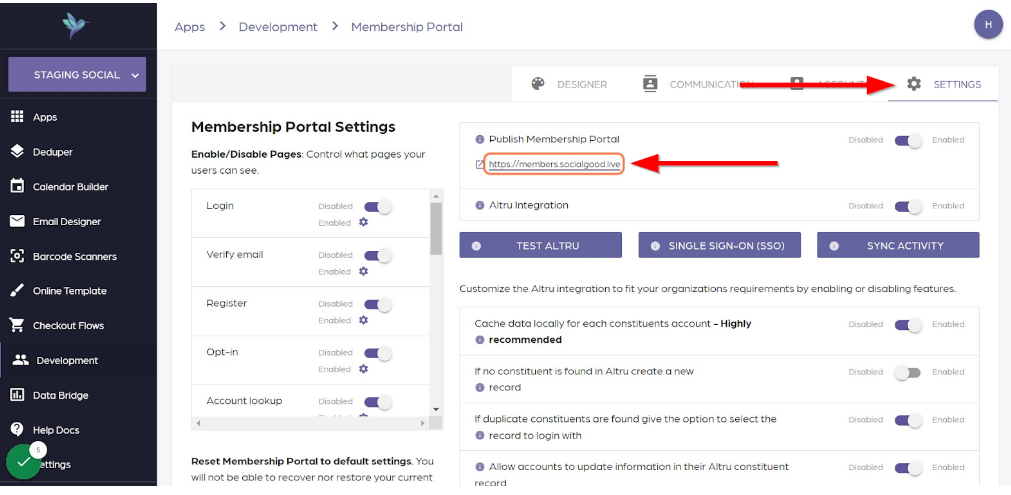
4: Go to Settings then click the Membership Portal link to preview its content.
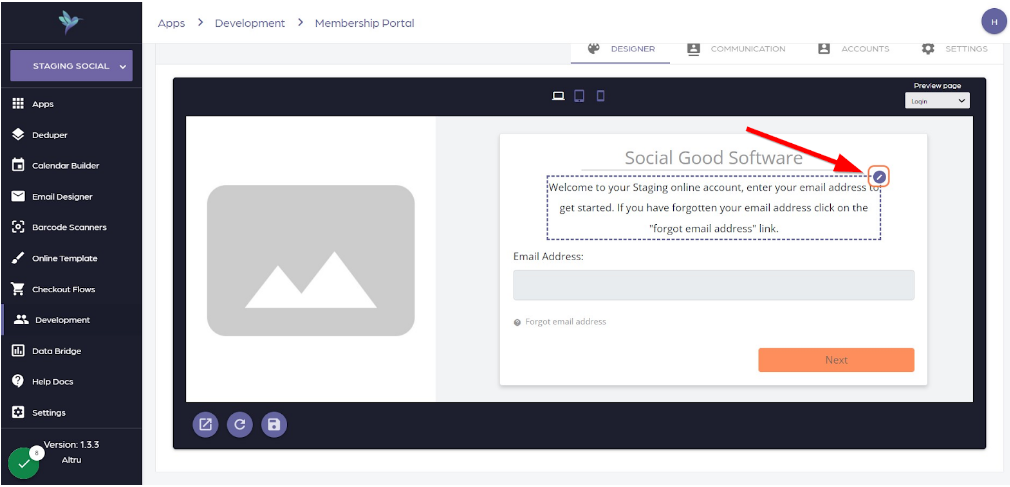
5: You can edit the membership portal content by going to the Designer tab.

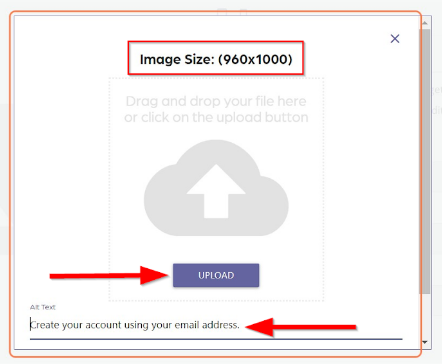
6: Click the pencil sign to start adding an image and edit the content. When adding an image, click the delete icon and then upload the picture. Make sure that it has the exact image size required by the portal to avoid being cropped. You can also add an Alt tag for it.
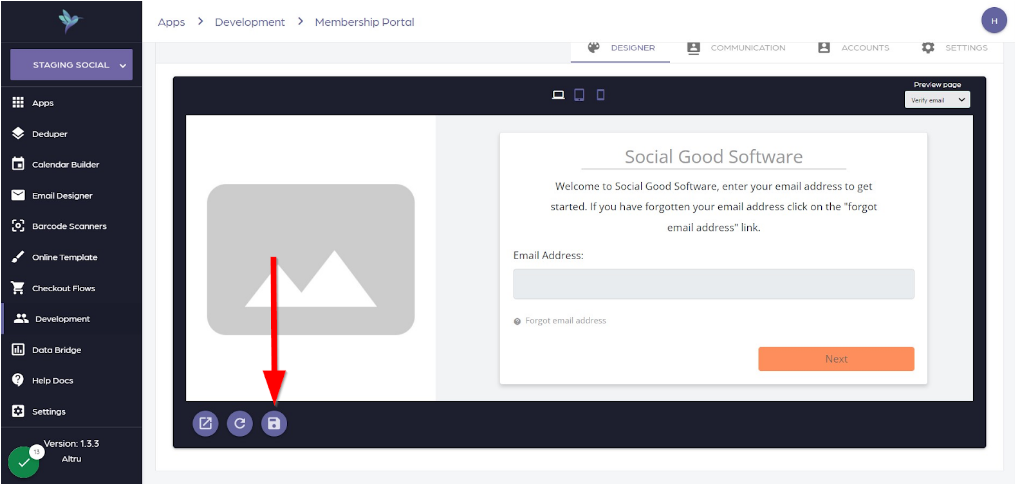
7: Preview to check the changes you made, then click Save if you are happy with the output.
8: You can edit the following pages the same as the above example:
- Login
- Verify email
- Register
- Opt-in
- Account lookup
- Phone lookup
- Membership lookup
- Help
- Email’s found

9: As for the following, you need to log in to your account before you can make changes to these pages:
- Overview
- Orders
- Refunds
- Membership
- Account
- Questions and Answers

10: To edit the above pages, log in to your SGS account then go back to Designer and refresh. Below is the Overview page that you can modify, click on the pencil sign and change the labels as you want. Save the changes you made if you’re content with the output.

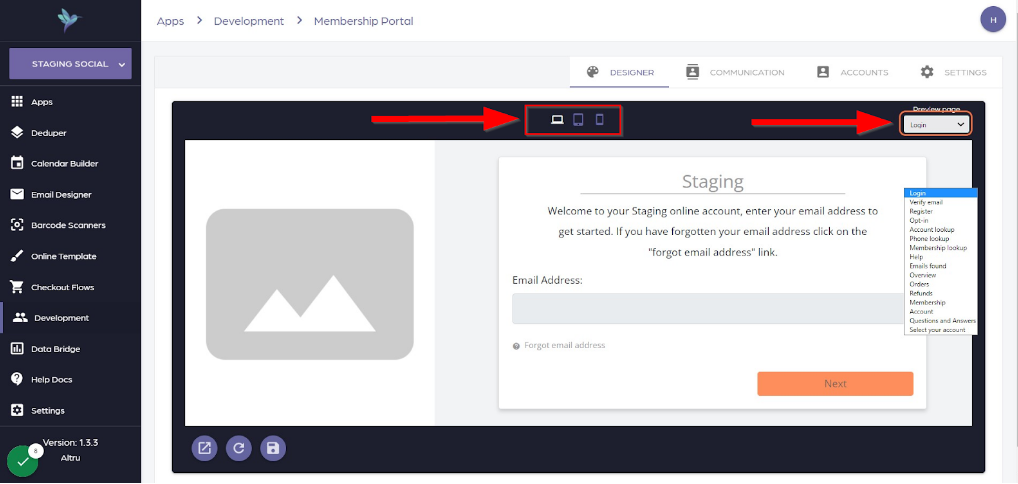
11: You can proceed to other pages and make necessary changes by going to the Preview Page. You can also check what these pages and sections look like on desktops, tablets, and phones.
You can edit your membership portal but some pages require you to log in to your account while other needs you to log out.
Please reach us through our support channel if you have questions.
How to assign a membership level to a membership card
Introduction
Learn to assign a membership level to a membership card to accurately link different membership card designs to one email. Make sure that you have the Program name and Level matched and spelled the same in Altru. This will make sure that every time this specific program name and level are referenced, this specific membership card design will show up.
Steps on how to assign a membership level to a membership card
1: Go to your Social Good Software account and log in.

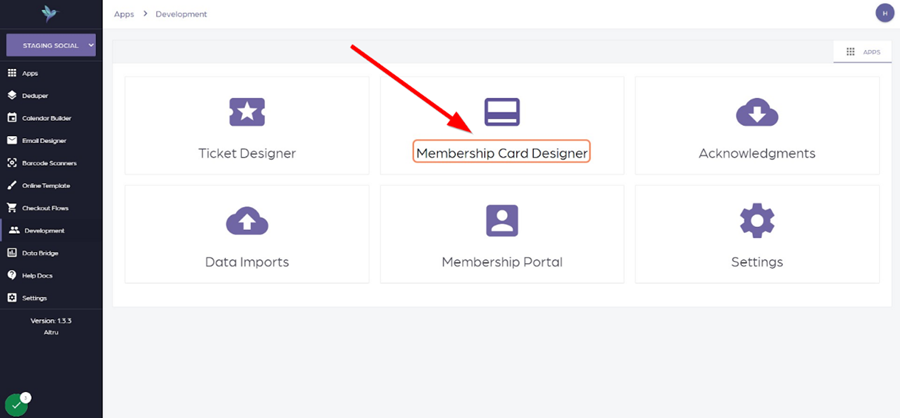
2: Proceed to Development.
3: Click the Membership Card Designer. Select the membership card design that you want to link to the program and level you prepared.
4: Proceed to Settings located on the upper right side of the window.
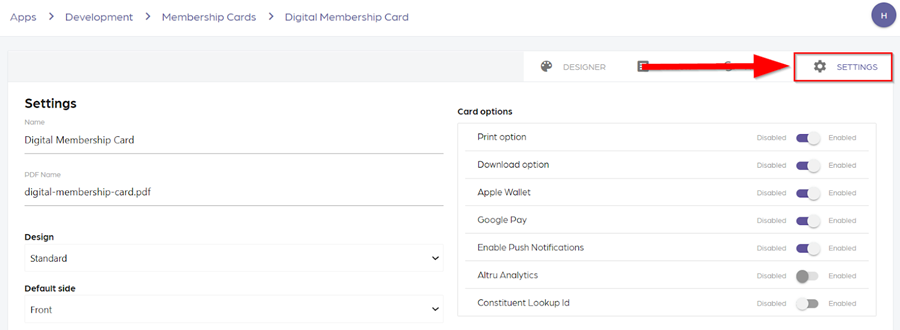
5: Below the section “Add a membership program and level” you put on the Program name and membership level the same as Altru to make it work. Save by clicking the plus (+) sign.
Program Name: Access Membership
Level: Starter/Inicial

Summary
Link a program name and level to a specific membership card design. This will make sure that every time an email is sent out containing that program name and level, the membership card design link to it will show up.
You don’t have to waste time creating separate emails for different digital membership card designs. You only need to create one and link all membership card designs to it. With this, you save time and effort when manually doing it.
Please reach out to us through our support channel if you have more questions.
Calendar Builder: Timed ticketing and how to simplify it
How to add the eTicket link to the default acknowledgment email in Altru
In this guide, you will be able to learn how to add the eTicket link to the acknowledgment email in Altru. With this, your constituents will be able to download and check it easily as it was already in the transactional email sent to them.
Steps on How to Add eTicket Link to the acknowledgment email
1: Go to your Altru account and proceed to Web.

2: Click on Default acknowledgment email.

4: A dialog box will pop out that helps change the link into an e-Ticket link inside the email.
5: You can add the link anywhere you are comfortable inside the email. For illustration, we will add this link below the Receipt Grid.

6: Add the merge field by going to Insert and clicking the merge fields.

7: A dialog box will pop out in which you need to click on Summary > eTickets.

8: From the dialog box under e-Ticket, drag the Begin link to the e-Ticket page and drop it at the beginning of Download eTicket. Same with the End link to the eTicket page, but drop it at the end part.

9: Once done, click on Save.

The link to your e-Ticket is now added to your transactional email. If you have more questions or clarifications please reach out to us through our support channel.