This tutorial will guide you how to configure availability on your calendar of remaining seats for a specific event.
Requirements:
An already created calendar using Social Good Software
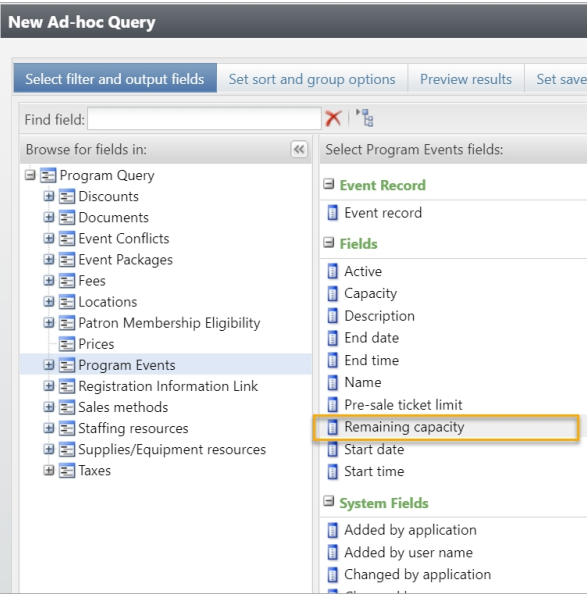
An already created Reserved Events Query
Steps:
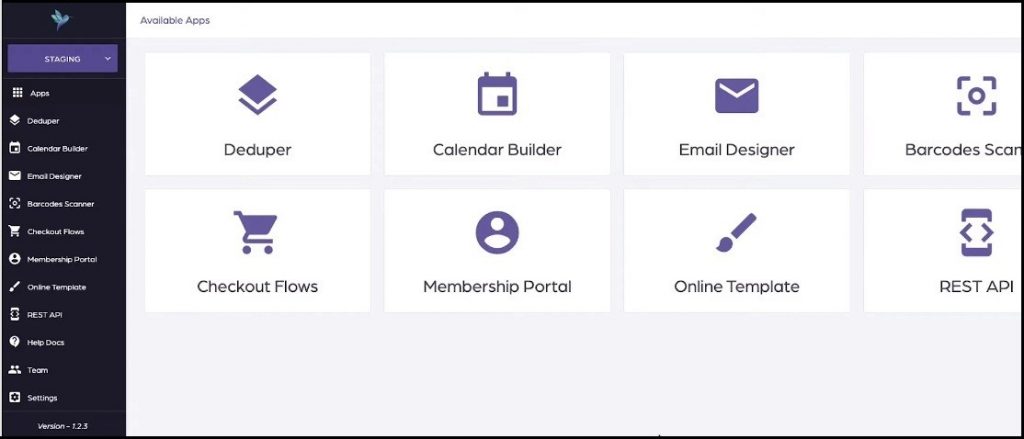
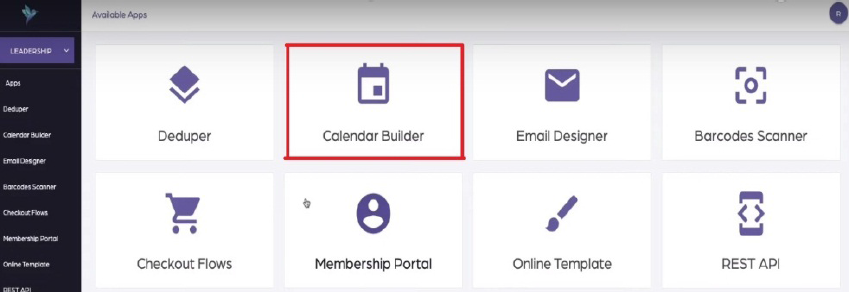
1. Click “Calendar Builder” tab on Social Good App. Now click a calendar from available calendars to open the calendar for which you want to configure availability.

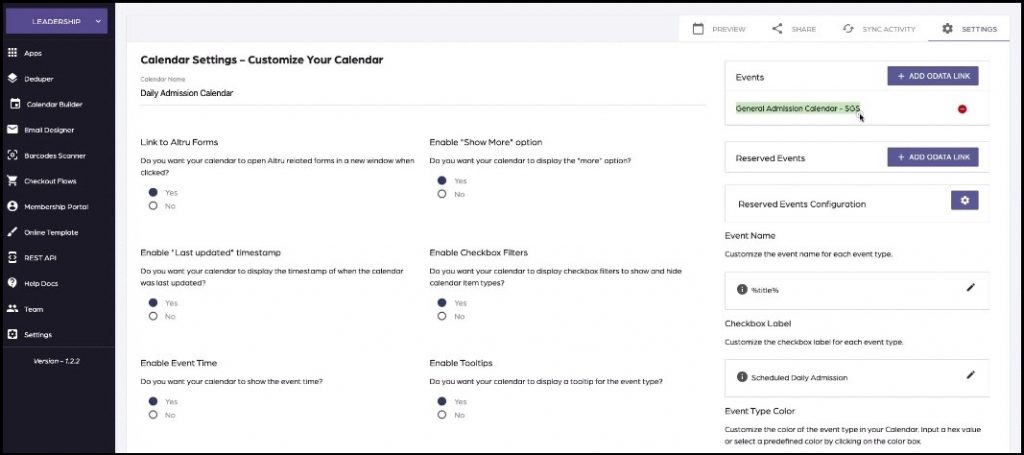
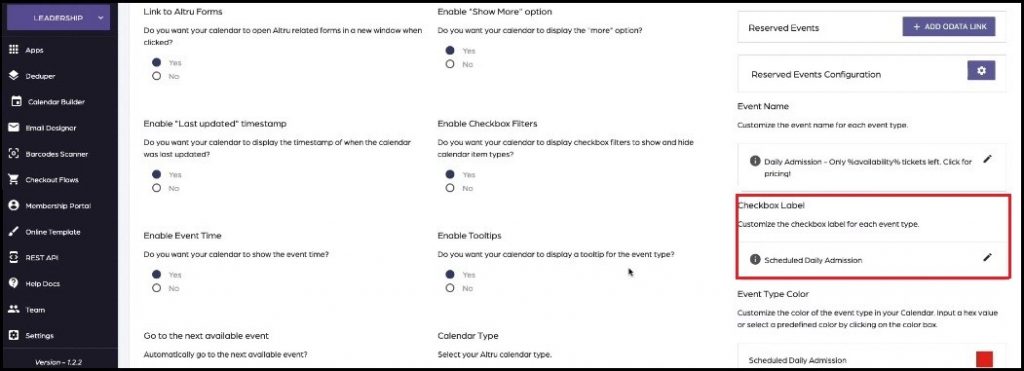
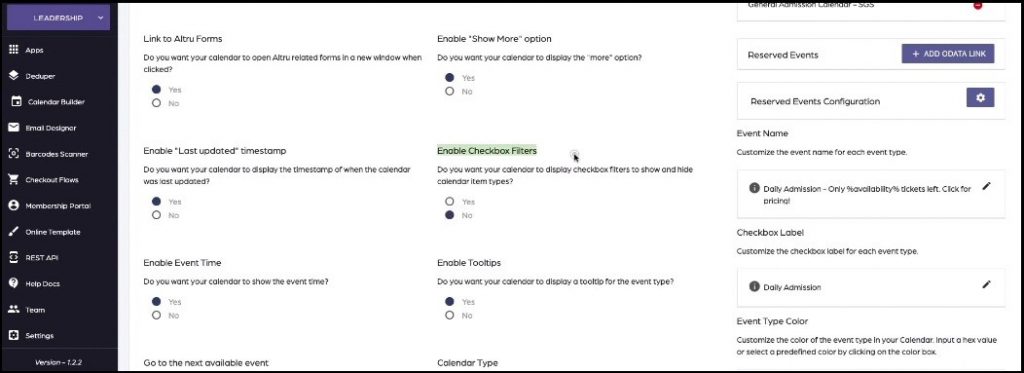
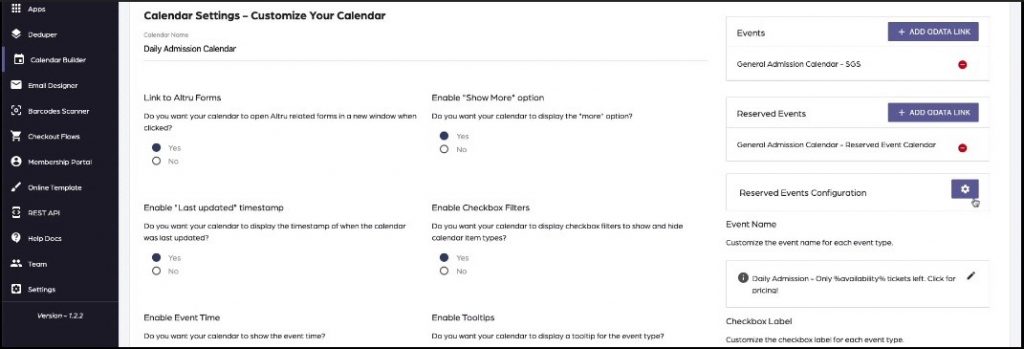
2. Click “SETTINGS” on top right of the interface. This will open settings page with many preferences to customize your calendar.
3. Click settings icon in front “Reserved Events Configuration” on the top right of the setting page.
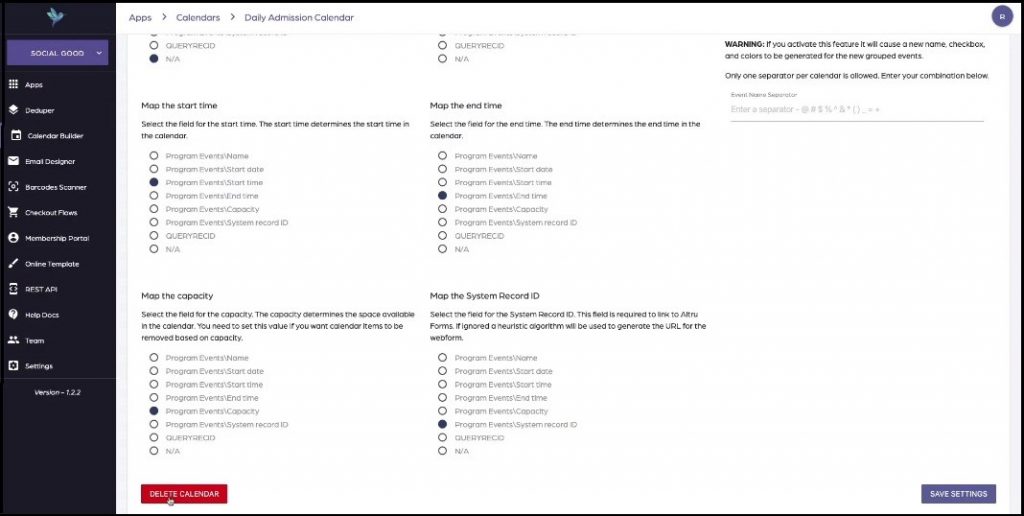
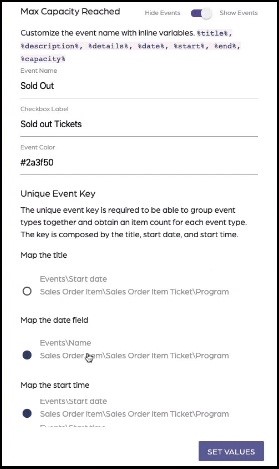
4. This will open settings options for reserved events configuration. From the settings options you need to map three different things i.e. Title, Date Field, and the Start Time correctly. Now click “SET VALUES” at the bottom to go back to main settings page.
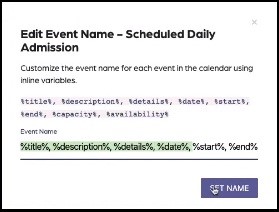
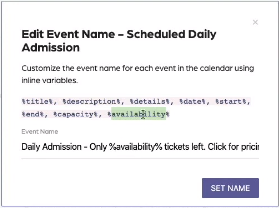
5. Now click pencil sign below “Event Name”. This will open an on-screen message asking you to edit and customize the event name using nine available variables. Use the variable “%availability% to show the availability on the calendar title for each calendar type.
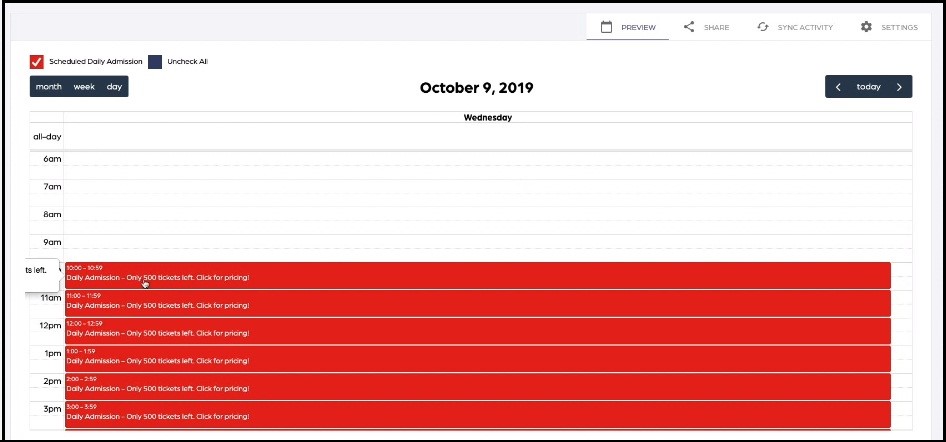
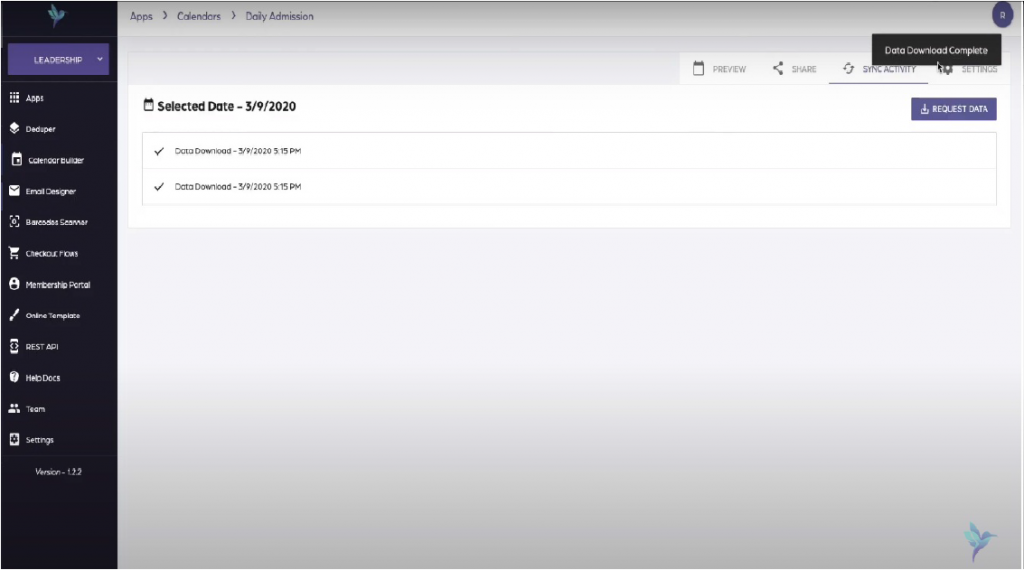
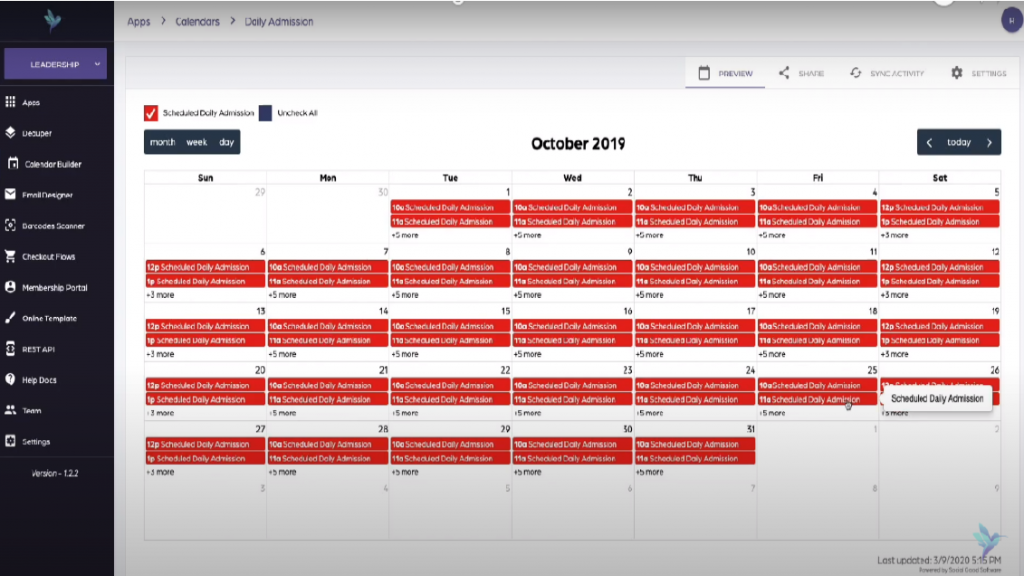
6. Click “PREVIEW” tab on top of the interface to preview whether availability shows up on the calendar or not.
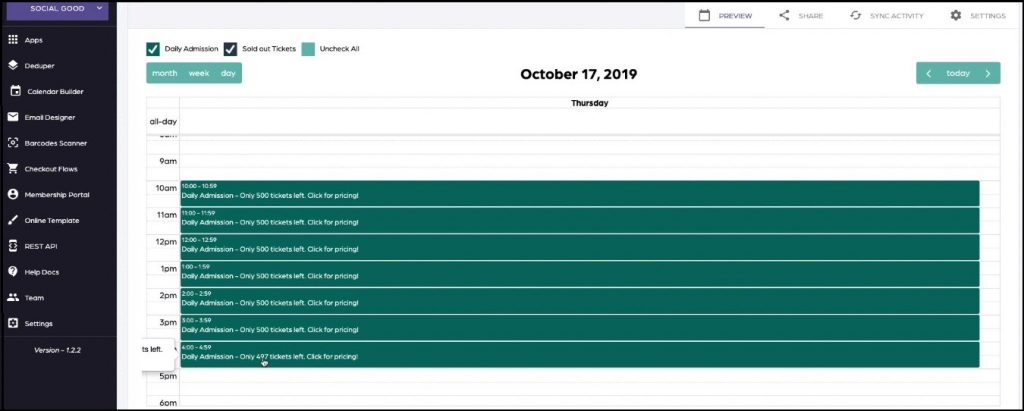
Note: The availability will only show up if you have reserved events configuration and query setup correctly.