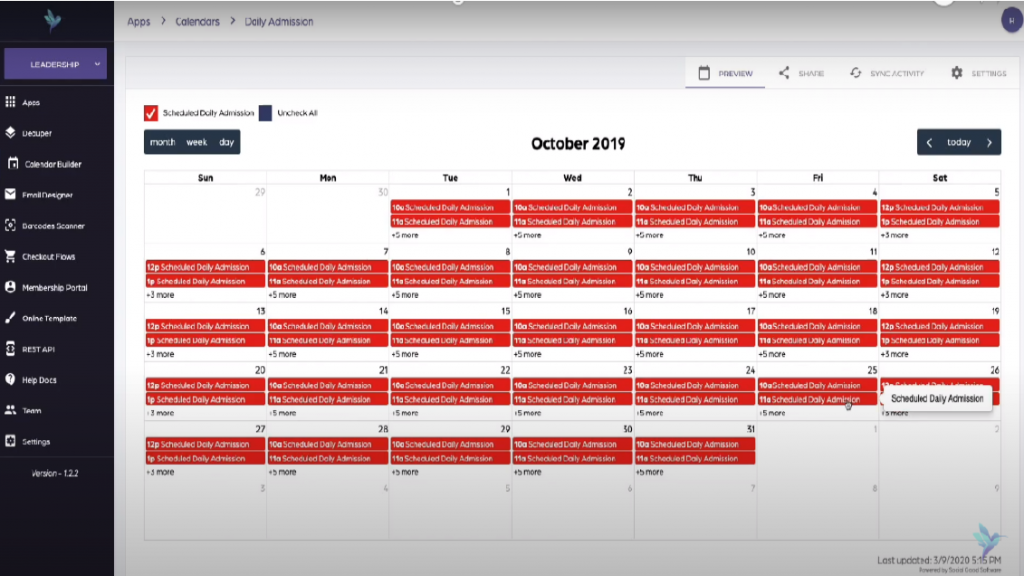
How to create a calendar for Altru using Social Good Software
Social Good Software allows you to properly manage your office activities. This video and short tutorial will step-by-step teach you how to build a calendar for Altru using Social Good Software.
Requirements:
- Social Good Software account
- Query(s) (discussed in the previous article) in information library for powering the Altru calendar
Steps:
- Click “Calendar Builder” tab from the interface of Social Good Software and then click “create calendar”.

- Next write the name (e.g. Daily Admission) of your Altru calendar and click “next”.
- Next you will be asked to add ODATA Links. By clicking “ADD DATA LINK” button, a text bar for adding the link will appear.
- Now go to the information library where you have built the query and click “Get ODATA link” on top of the interface.
- Copy the link and paste it into “link” space (described in step 3) of Social Good Software and click “next”. The tool will take a couple of seconds for validating the ODATA Link.

- When the link is validated click “next” button. A screen message with “Add ODATA Link” will appear as in step 4. Repeat the steps if you want to add more queries, otherwise just click “next”.
- Now a screen message will appear to guide you about mapping Altru Data Fields into your calendar.

- A series of questions and options will appear on the screen for mapping the fields. Select suitable preferences according to your specific needs and situation. If you want to ignore some fields you can do so by clicking “N/A” option below these questions.
These preferences include:
1) Map the Title

The Title determines how the calendar items are grouped. Check the data grouping in library information and click the option according to how your data is grouped in the library information.
2) “Map the Description” and “Map the details” preferences
If the event has some description and details e.g. name, start date, start time etc. select them accordingly or click N/A if the event doesn’t have any description.
3) “Map the Date field”, “Start Time”, and “End Time” preferences
For mapping the date field click “Program Events/start date”, for mapping the Start time click “Program Events/Start time”, and for mapping the end time click “Program Events/End time”
4) Map the System Record ID
The most important preference for mapping the fields is “Map the System Record ID”.
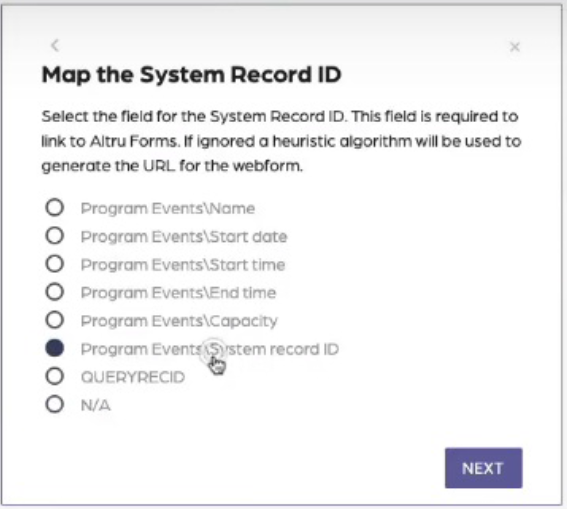
After mapping the System Record ID, and clicking the “next” button, “Confirm Map Fields” overview will appear to counter check the preferences you have selected in the previous steps.
- Click “Next” to confirm the Map fields. Now a series of following prompt preferences (mostly with “Yes/No” options) for your Altru calendar will appear.
- Link to Altru Forms

Select “Yes” if you want your Altru calendar to open Altru related forms in a new window when clicked, and if it is a public placing calendar.
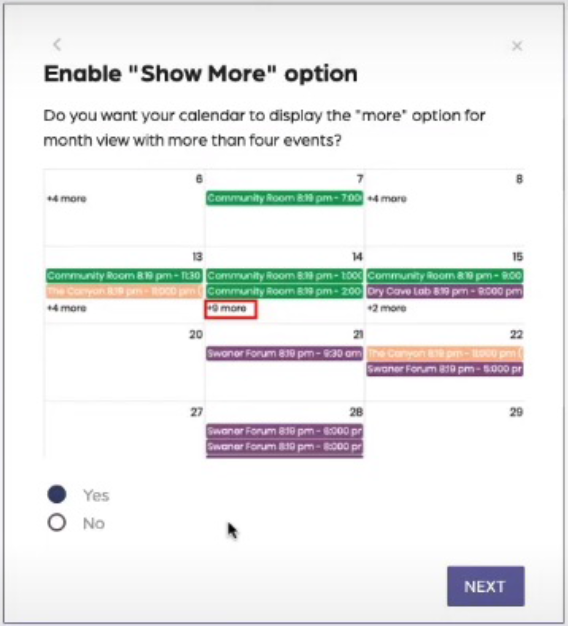
- Show More
Select “Yes” if you want to display more than four events in month view of the calendar.
- Last updated timestamp
Select “Yes” if you want to display when the last time calendar was updated.
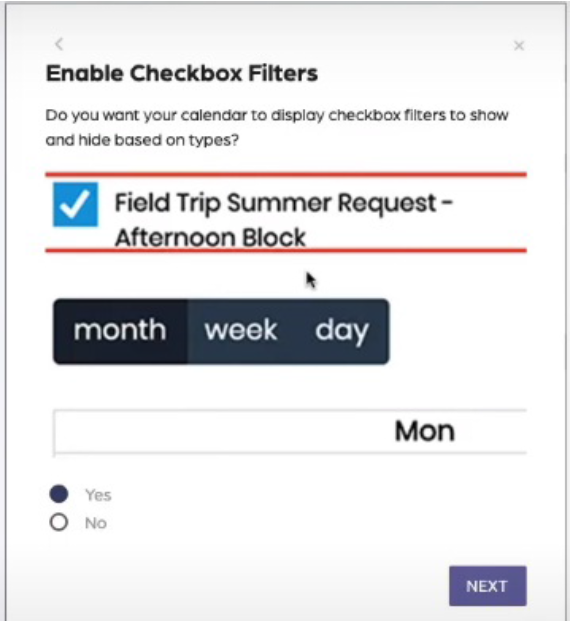
- Checkbox Filters
Select “Yes” if you want your calendar to display checkbox filter to show and hide based on types.
- Event Time
Select “Yes” if you want your calendar to show event time along with the event.
- ToolTips
Enabling this option will make the Altru Calendar display tooltips.
- Next available event
Select “Yes” if you want your calendar enable you to jump to next available event in the calendar without manually going through all the months. If all of your events are in the past select “No”.
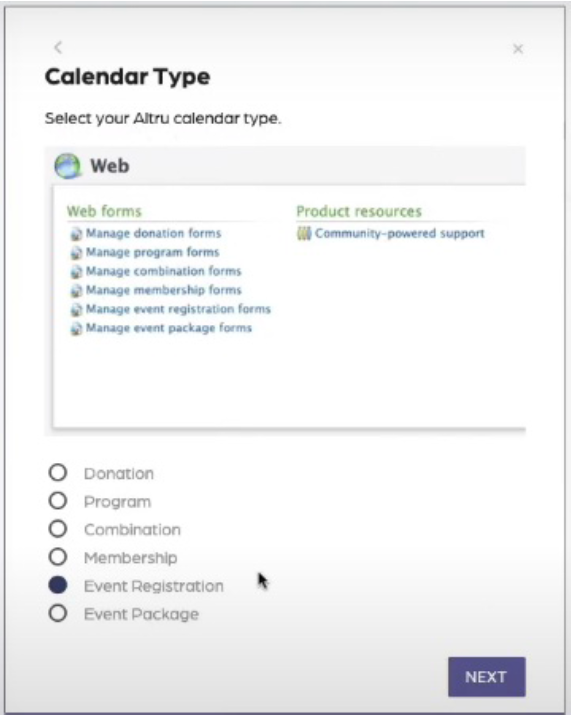
- Calendar Type
Select the type of your calendar accordingly from the options provided.
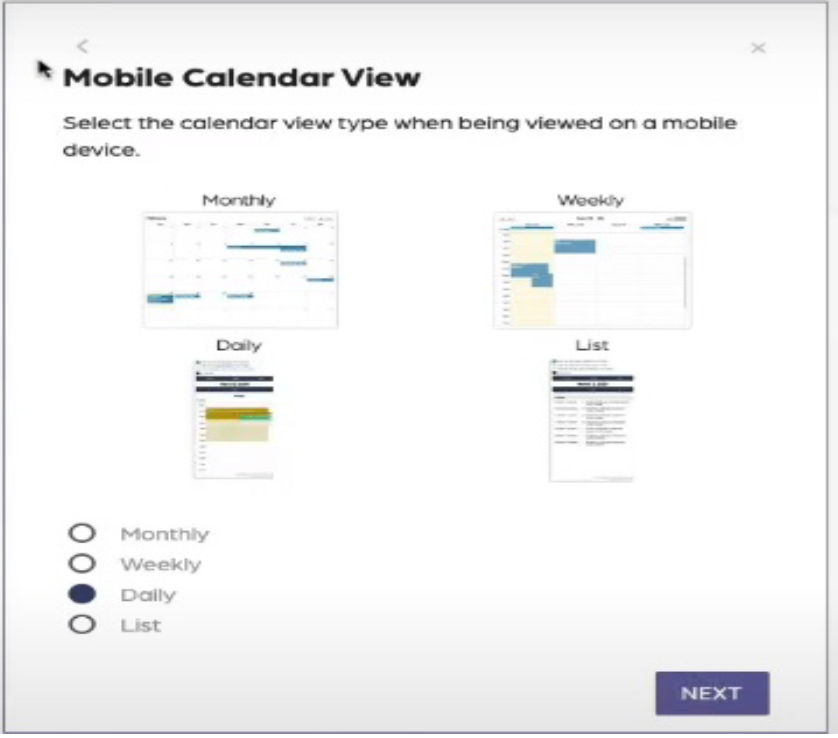
- Mobile Calendar View
Select how you want your calendar to be viewed (either monthly, weekly, daily or list view).
- Days to show on Calendar
You can select the days which should be visible on the calendar.
- After selecting your options for all the above preferences, an overview will appear to countercheck the preferences. Now click “Create Calendar” to create your Altru calendar.

- Double click the calendar icon with its name. It takes a couple of minutes before your Altru Calendar is created.
- Click “sync activity” tab on the top right of the tool to update the tool. Syncing the calendar takes a couple of minutes.
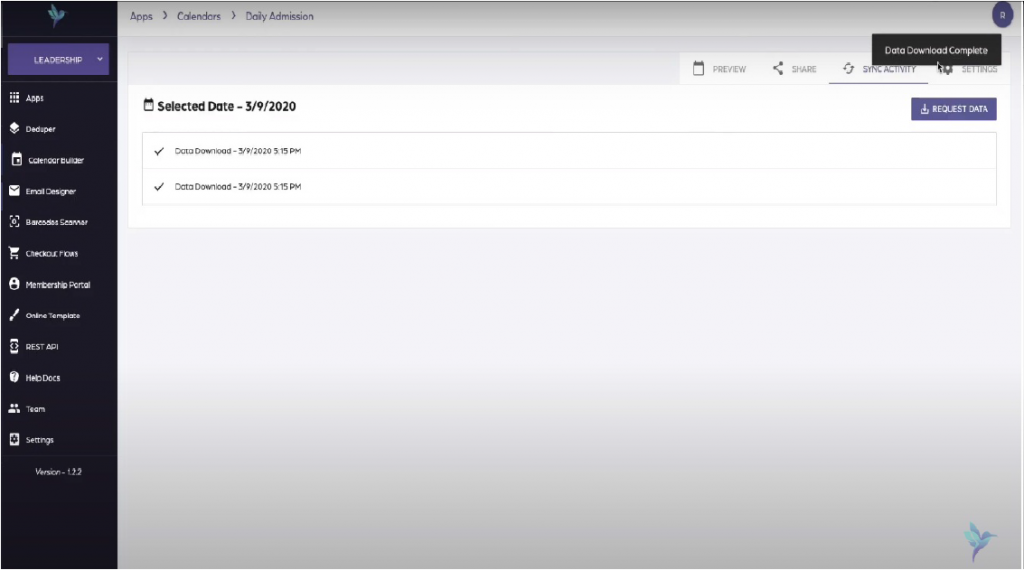
- After it is synced click “preview” button on top right of the tool to preview your calendar.
- Navigate to your desired month by clicking “today” button on the top right of the Altru calendar.
- Your Altru calendar is ready now and you can view all the scheduled activities of the selected month.
