• Skip to primary navigation
  • Skip to main content

Social Good Software

Creating amazing guest experiences through innovative software solutions for the social good community

  • Features
    • Deduper
    • Calendar Builder
    • Email Designer
    • Barcodes Scanner
    • Online Template
    • Checkout Flows
    • Membership Portal
    • Data Bridge
  • Pricing
  • Contact
    • About
    • Contact
    • Careers
  • Login
  • Get Price

Calendars

How to set up calendar days

August 23, 2021 By Rick Hernandez

Introduction

Calendar Builder is a tool that you can use to create and customize a calendar for internal and personal use. You can also utilize this tool to modify your calendar before sharing it on your website.

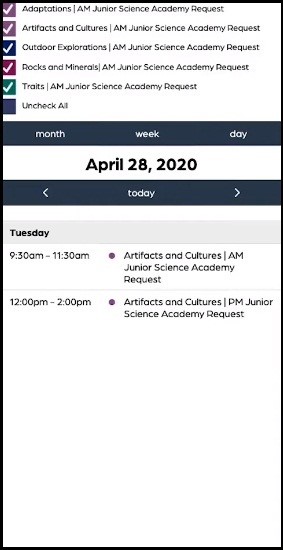
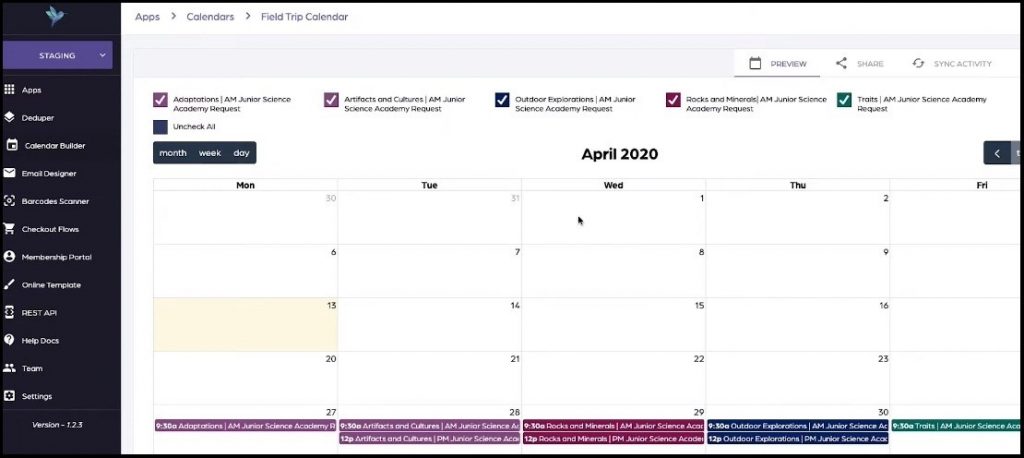
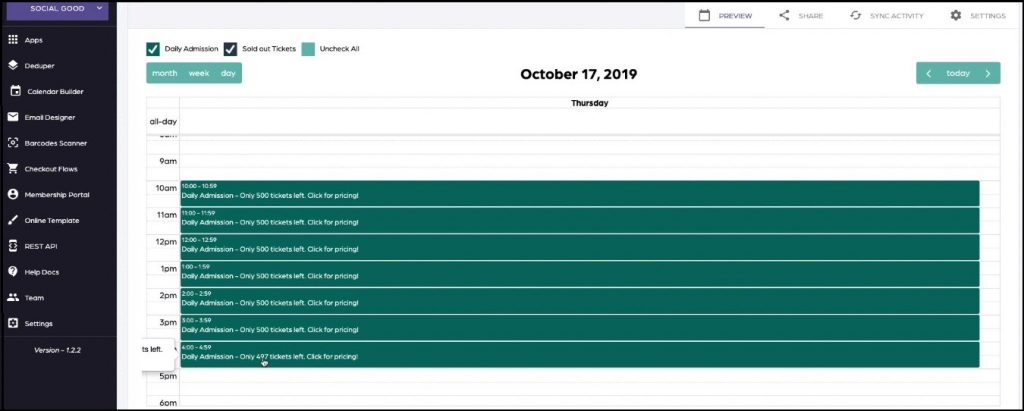
When you set it up, you must consider its visual appearance. Making the days with scheduled activities be visible rather than all seven days will make it easy to look up and organize. With this, you can pull off a more sleek and direct look at what events are coming up on what days

Steps on how to set up the calendar days.

1: Go to your Social Good Software account

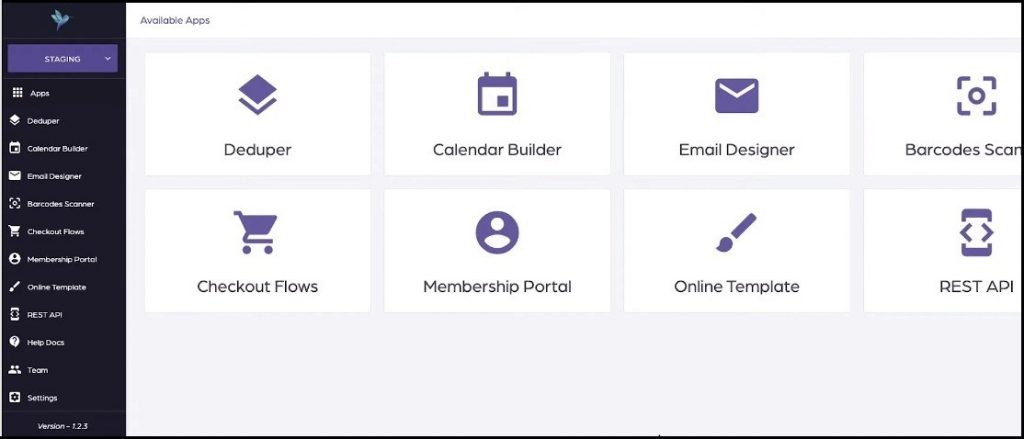
2: Proceed to the tool.

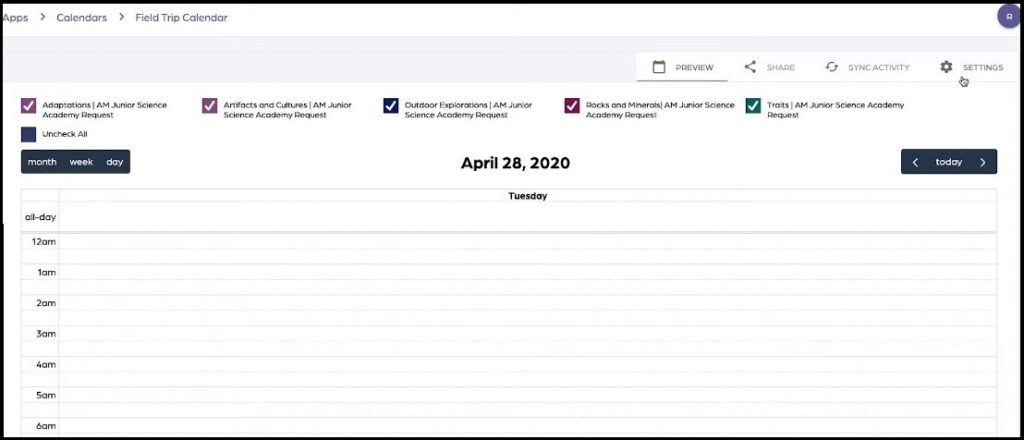
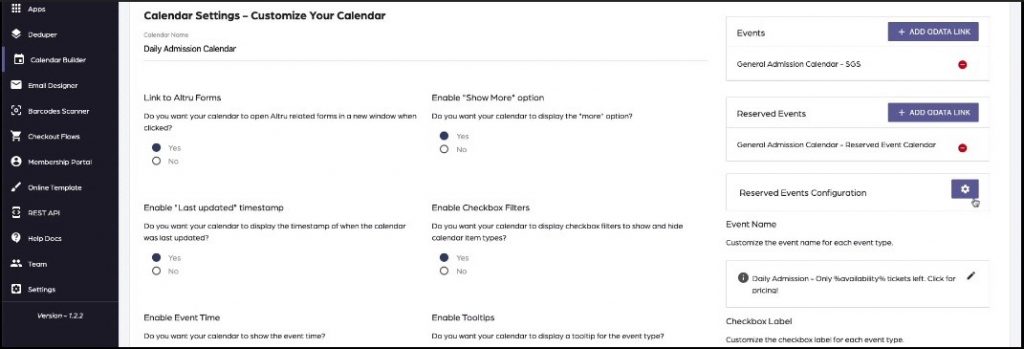
3: Select which one you want to edit the display date.

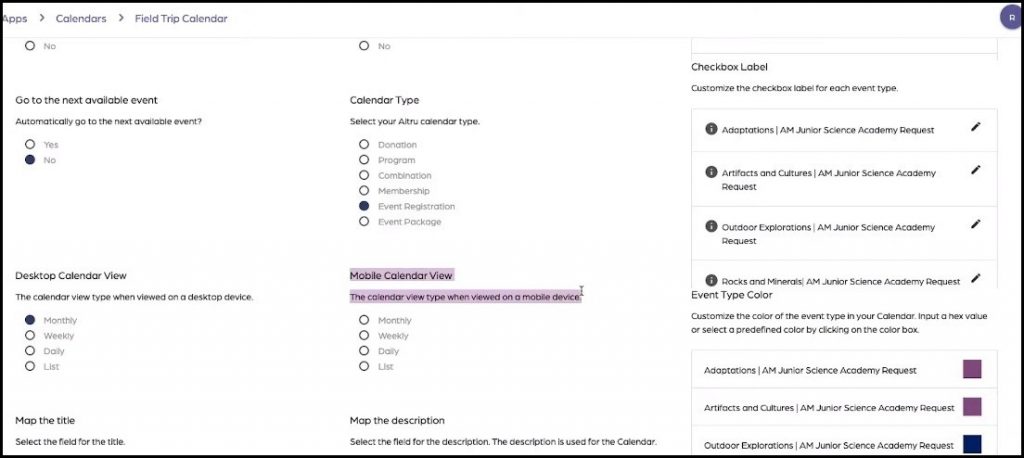
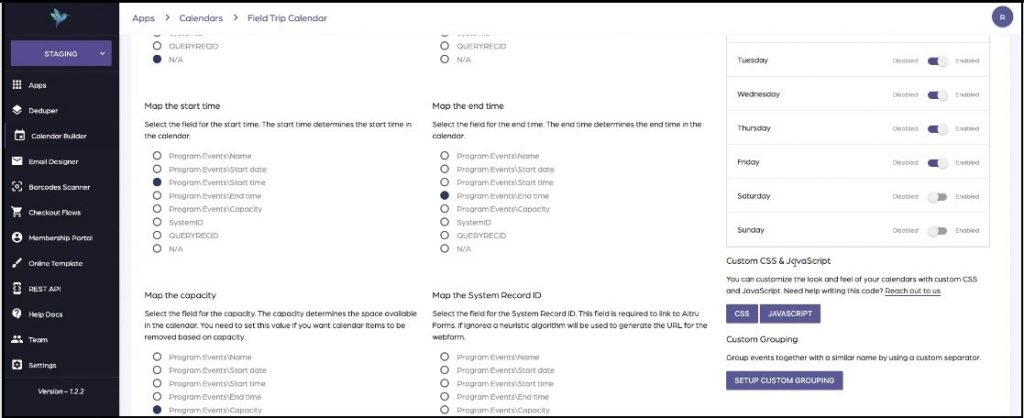
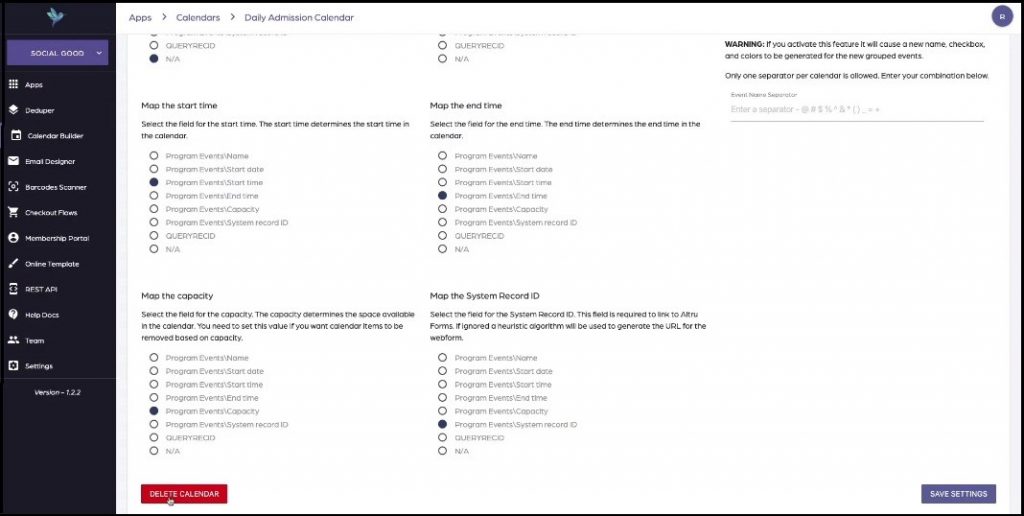
4: Click on Settings at the upper right side of the window.

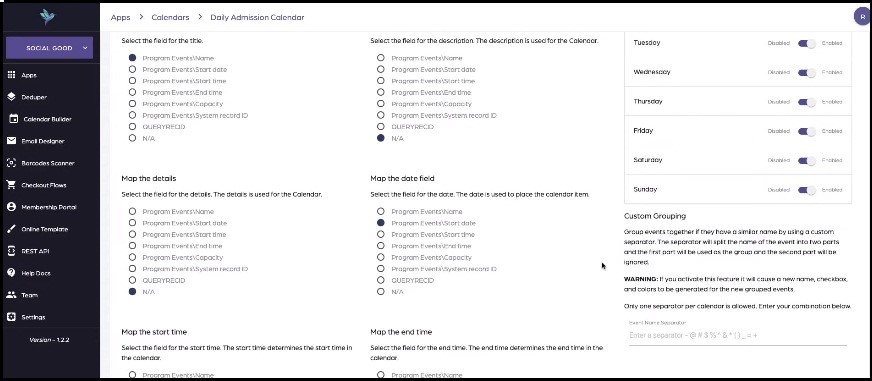
5: Look for the option “Setup Calendar Days” in the second column of the Settings which help you change the days displayed.

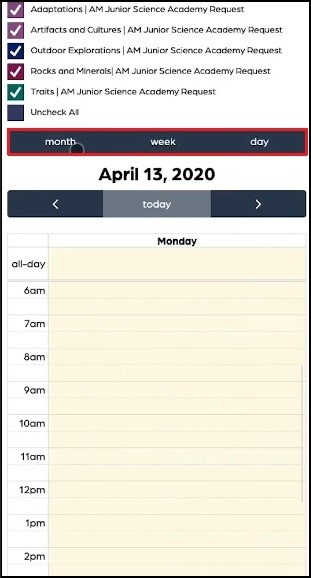
6: Click on the gear icon and choose the day you want to display.

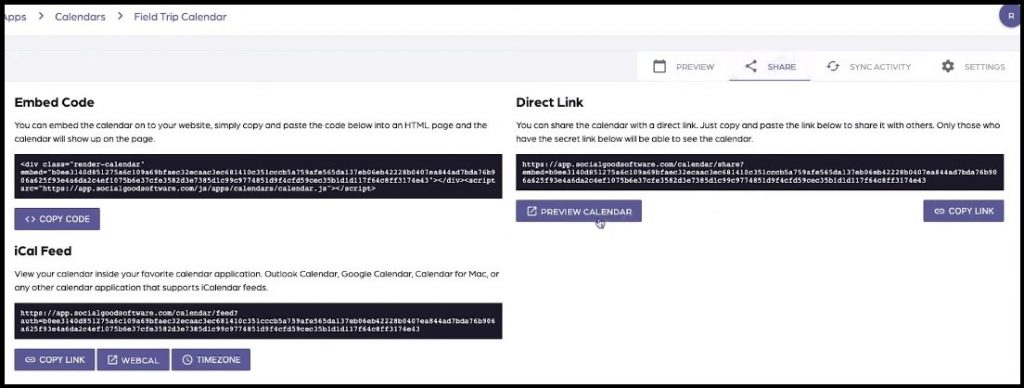
7: Don’t forget to save all the changes you made when you are ready to export it.

Summary

Having fully customize option is a great plus for your organization. We hope that you learn more about this tool and take advantage of it to customize, edit, and organize your calendar. As always, if you have any additional questions, don’t hesitate to ask us!

Filed Under: Calendar Builder, Calendars, Help Center

How to configure a window of time

May 2, 2021 By Rick Hernandez

Filed Under: Calendar Builder, Calendars, Help Center

Hide events relative to the current time

May 2, 2021 By Rick Hernandez

Filed Under: Calendar Builder, Calendars, Help Center

How to clear the cache from a calendar

October 9, 2020 By Rick Hernandez

Filed Under: Calendar Builder, Calendars, Help Center

How to add a Timed Ticketed calendar to WordPress

May 29, 2020 By Rick Hernandez

Filed Under: Calendar Builder, Calendars, Help Center

How to setup a list view for calendar on a mobile device

April 13, 2020 By Rick Hernandez

This short tutorial and video will guide you how to set up a list view for calendar on a mobile device.

Why Need a List View for Calendar on a Mobile Device:

A detailed view of calendar on mobile device looks either overcrowded or it has so many blank areas. Hence is becomes very difficult to use on a mobile device. In order to avoid this, a customized list view for calendar on a mobile device is very useful.

Requirements:

A calendar already built by using Social Good Software.

Steps:

1. Click “Calendar Builder” tab on Social Good App. Now click a calendar from available calendars to open the calendar for which you want to set up list view on a mobile device.

2. Click “SETTINGS” on top right of the interface. This will open settings page with many preferences to customize your calendar.

3. Now look for “Mobile Calendar View” preferences. You can select any of the preferences i.e. “Monthly”, “Weekly”, “Daily”, or “List”.

4. Select “List” from “Mobile Calendar View” and press “SAVE SETTINGS” button on bottom right of the screen. Now click “PREVIEW” from top right of the screen to preview list view for calendar on a mobile device.

5. Next click “SHARE” from top right of the screen and then click “PREVIEW CALENDAR” below “Direct Link” to preview the calendar on a different tab. 

6. Now press “SHARE” and then “PREVIEW” to preview the calendar on a mobile device. Now you can preview the calendar on a screen similar to that of a mobile device.

7. You can change the view type such as daily, weekly, or monthly any time by going back to settings just as described in step 3. Now open the mobile view again as described in step 4 and 5 and refresh the view by clicking “…….”.

8. As you can observe, the “daily”, “weekly” or “monthly” views on a mobile device are not as user-friendly as list view. You can also directly toggle between “daily”, “weekly”, or “monthly” view by clicking “day”, “week”, or “month” from mobile view of your calendar.

Filed Under: Calendar Builder, Calendars, Help Center

How to add custom CSS and JavaScript to Calendar

March 20, 2020 By Rick Hernandez

This short tutorial and/or video will guide you how to add custom CSS and JavaScript to calendar.

Why Need to Add Custom CSS and JavaScript to Calendar:

Adding custom CSS and JavaScript enables you to improve the functionality of your calendar to meet your organization’s special requirements and preferences.

Requirements:

An already created calendar using Social Good Software

An already written CSS and Javascript you want to add to your calendar

Note: You can also “Reach out to us” if you need help writing these code.

Steps:

1. Click “Calendar Builder” tab on Social Good App. Now click a calendar from available calendars to open the calendar to which you want to add custom CSS and JavaScript.

2. Click “SETTINGS” on top right of the interface. This will open settings page with many preferences to customize your calendar.

3. Scroll down the settings page and look for blue colored “CSS” and “JavaScript” tabs on the left side of the settings page.

4. Now click “CSS” tab, copy paste the CSS code in “Custom CSS Code” box and press “Save”.

5. Similarly click “JavaScript” tab, copy paste the JavaScript in “Custom JavaScript Code” box and press “Save”.

6. Now click “SAVE SETTINGS” at the bottom left of the settings page and scroll up the page.

7. Next click “Preview” tab on the top right of the page to preview the added functionality of CSS and JavaScript code.

8. Click “Share” tab on the top right of the page and then click “Preview Calendar” and go down to mobile device by shrinking your window down or by using your mobile device to preview the calendar on a mobile device.

Note: Anytime you want to remove/edit the CSS and JavaScript from your calendar go to “CSS” and “JavaScript” tabs and remove/edit the code.

CSS

.render-calendar .container-wrapper {
    max-width: 80%;
    float: left;
}

.render-calendar .checkbox-wrapper {
    width: 19%;
    overflow: scroll;
    padding-left: 1%;
}

@media (max-width: 650px) {
    .render-calendar .container-wrapper {
        max-width: 100%;
    }

    .render-calendar .checkbox-wrapper {
        width: 100%;
        padding-left: 0%;
    }

    .render-calendar .checkbox-container {
        width: 100%;
        max-width: 100%;
    }
}

JavaScript

var checkboxes = $(container).find('.checkbox-wrapper').detach();
$(container).append(checkboxes);
var height = $(container).find('.container-wrapper').height();
$(container).height(height);
$(container).find('.checkbox-wrapper').height(height);

Filed Under: Calendar Builder, Calendars, Help Center

How to set up custom grouping

March 11, 2020 By Rick Hernandez

This article will guide you how to set up custom grouping for calendar.

Why Need to Set up Custom Grouping for Calendar:

Custom Grouping on calendar will enable you to group events based on event titles that have a specific pattern. This is very useful especially when you have too many checkboxes and categories in your calendar.

Warning:

  • If you activate this feature, it will cause a new name checkbox and colors to be generated for the new group events. So if you have any customs labels or colors, you will need to redo them after enabling the custom grouping.
  • Only one separator per calendar is allowed.

Requirements:

An already created calendar using Social Good Software

Steps:

1. Click “Calendar Builder” tab on Social Good App. Now click a calendar from available calendars to open the calendar for which you want to set up custom grouping.

2. Click “SETTINGS” on top right of the interface. This will open settings page with many preferences to customize your calendar.

3. Scroll down the settings page and look for “Custom Grouping” on the left side of the settings page.

4. To learn more about the process of custom grouping for your calendar watch the video.

Once you have correctly followed the steps in this tutorial and video demo, all the events of the same event types (first part) and different event names will be grouped together. However grouping will be done under the event type, and event names will be ignored.

Filed Under: Calendar Builder, Calendars, Help Center

How to configure availability in a calendar

March 11, 2020 By Rick Hernandez

This tutorial will guide you how to configure availability on your calendar of remaining seats for a specific event.

Requirements:

An already created calendar using Social Good Software

An already created Reserved Events Query

Steps:

1. Click “Calendar Builder” tab on Social Good App. Now click a calendar from available calendars to open the calendar for which you want to configure availability.

2. Click “SETTINGS” on top right of the interface. This will open settings page with many preferences to customize your calendar.

3. Click settings icon in front “Reserved Events Configuration” on the top right of the setting page.

4. This will open settings options for reserved events configuration. From the settings options you need to map three different things i.e. Title, Date Field, and the Start Time correctly. Now click “SET VALUES” at the bottom to go back to main settings page.

5. Now click pencil sign below “Event Name”. This will open an on-screen message asking you to edit and customize the event name using nine available variables. Use the variable “%availability% to show the availability on the calendar title for each calendar type.

6. Click “PREVIEW” tab on top of the interface to preview whether availability shows up on the calendar or not.

Note: The availability will only show up if you have reserved events configuration and query setup correctly.

Filed Under: Calendar Builder, Calendars, Help Center

How to delete a calendar

March 11, 2020 By Rick Hernandez

This short tutorial will guide you how to delete your calendar. It will also inform you of potential consequences of doing so and also which steps you should take before deleting your calendar.

Warning:

If your calendar is embedded in someone’s website or your mail client, it would stop appearing there and display an error message. So you need to notify them in advance to remove the embedded calendar.

All the events, system logs, API requests, and the data downloads related the calendar will also be deleted. So, if you want to keep this information for the auditing or any other purpose, it is highly recommended that you should not delete the calendar.

Steps:

1. Click “Calendar Builder” tab from you Social Good App, and open the calendar you want to delete.

2. Now click “SETTINGS” on the top right side of the interface and scroll all the way to the bottom of the page.

3. Click “DELETE CALENDAR” on the bottom left of the settings page. You will get an onscreen message to inform you of the consequences of deleting the calendar.

4. Once you fully understand the consequences and still want to delete the calendar, click “DELETE CALENDAR”. This will delete the calendar, and it will no longer be available in Social Good App, or anywhere else.

Filed Under: Calendar Builder, Calendars, Help Center

  • Page 1
  • Page 2
  • Go to Next Page »

Social Good Software | Altru software integrations | Deduper | Calendar Builder | Email Designer | Barcodes Reader | Checkout Flows | Membership Portal | Online Template | API Integrations