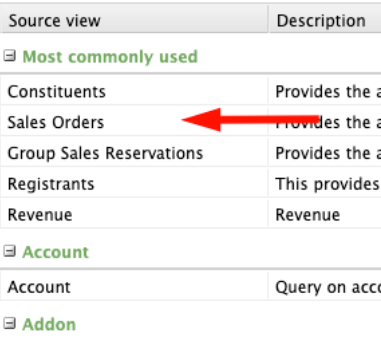
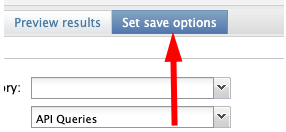
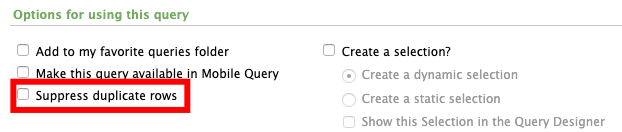
• Skip to primary navigation
  • Skip to main content

Social Good Software

Creating amazing guest experiences through innovative software solutions for the social good community

  • Features
    • Deduper
    • Calendar Builder
    • Email Designer
    • Barcodes Scanner
    • Online Template
    • Checkout Flows
    • Membership Portal
    • Data Bridge
  • Pricing
  • Contact
    • About
    • Contact
    • Careers
  • Login
  • Get Price

admin

Social Good Software Update 1.2.6v

June 8, 2020 By admin

Data Bridge

  • Created a data bridge based on an ODATA query
    • Create, Delete, Share and auto-update data with Altru
  • Connect Data Bridge with Google Sheets and Excel
    • Authentication credentials are generated per widget
  • You can create widget types
    • Gauge
    • Google Sheet
    • Excel
  • Restricted access to the data bridge based on subscription plan – Expert plan is required

Calendar Builder

  • Added support for IE11 to render calendars
  • Added support for sites with jQuery 1.9.0. or older
  • Fixed a minor bug when duplicate keys are used on creation
  • Added better support for windows to view reservation fields selection

Email Designer

  • Fixed a minor bug with Emails not sending when Altru is not available
  • Fixed a minor bug with multiple download complete dialogs showing

Barcodes Scanner

  • Added new UI for administrator panel to work better with different resolutions
  • Added new dialog for color pickers on the Admin portal
  • Added new feature to view the valid barcode scanned in
  • Added continuous scanning option for mobile, web and desktop apps
  • Released a new version of the app
    • Android
    • Apple
    • Windows
  • Fixed a minor bug with barcodes not validating with Altru
    • You can now see error messages in the sync activity

Online Template & Checkout Flows

  • Dynamic checkout flows will only work if the Template script is embedded on the same page. (Fixes a bug with data binding)

System Improvements

  • Added better support to parse Altru URL for credentials when setting up the connection with Altru
  • Improved caching for old files on app.socialgoodsoftware.com

Filed Under: 2020, Help Center, Software Updates

How to create a Tickets Sold Today Query with Altru

May 25, 2020 By admin

Requirements

Before getting started with this guide please make sure you meet the following requirements.

  • You have an Altru account with permission to create ODATA queries

Once you have the query created you will be able to set up the query with the Social Good application.

How to create a ticketed program query

Step 1: Opening the information library

Go to your instance of Altru and log in with your username and password.

Sign in to your Altru account

Once you have logged in click on the “Analysis” tab on the navigation bar.

Click on the analysis tab

Click on the “Information Library” section sub-menu selection to open the query builder.

Information library

Step 2: Creating a new ad-hoc query

Click on the “Add an ad-hoc query” button to start the process of creating a new query

ad-hoc query with Altru

Select the “Sales Order” query type.

“Sales Order” Query Type

Let’s first start with the “Include records where:”

“Include records where:”

Sales Order Item\Sales Order Item Ticket\Tickets\Status is equal to Active (optional)

and Sales Order Item\Sales Order Item Ticket\Tickets\Ticket number is not blank (*required)

and Constituent\Email Addresses\Primary email address is equal to Yes (optional)and Sales Order Item\Sales Order Item Ticket\Program Events\Start date is today (*optional)

Feel free to change or adjust the query to your organization’s needs. For example, if your tickets are valid for an entire year you can use the “This calendar year” option.

Secondly let us output the fields “Results fields to display:” we will need.

“Results fields to display:”

Lookup ID (optional)

Sales Order Item\Sales Order Item Ticket\Program Events\Name (optional)

Constituent\Email Addresses\Email address (optional)

Sales Order Item\Sales Order Item Ticket\Tickets\Ticket number (*required)Sales Order Item\Sales Order Item Ticket\Tickets\System record ID (*required)

The result fields you choose to display will be shown in the application and can be used for looking up a constituent based on the output of the query. You just have to make sure you include them in the results fields to display and they will automatically show up in the mobile app.

Step 3: Preview and save query

Once you have finished creating your query it’s time to preview the data and save the query.

Click on the “Preview Results” tab on the top navigation of the query builder

“Preview results” with Altru

At this point you want to verify you are getting valid data and once you are happy with the output of the query you are ready to move on to the next step of saving the query.

Preview results

Click on “Set save options”

“Set save options” with Altru

Now it’s time to save the query. Give your query a name.

Give your query a name with Altru

Tickets Sold Today | Barcode Scanner

Go to the “Options for using this query” section and uncheck the “Suppress duplicate rows” option.

Uncheck the “Suppress duplicate rows” option

Lastly, make sure the Social Good app can run this query by giving it the right permissions.

Check the “Allow all users to run this query” option.

Check the “Allow all users to run this query” option.

Now you are ready to save the query click on the “Save and close” option.

Save and close option with Altru

That’s all there is to create a query for the Barcodes Scanner app.

FAQ on barcode scanner

  • Altru only supports 15,000 rows exported via ODATA links. If your query is larger than 15,000 rows you will need to create smaller queries with Altru by using date ranges. Example.

Filed Under: Barcodes Scanner, eTicket Queries

How to create an Account with Social Good Software

September 12, 2019 By admin

If you have been looking for a way to create a Social Good Software account, then look no further. In this short tutorial, you will learn how to create your account. Just follow the steps listed below.

Who needs to create this account?

  • You are an administrator for the account. An administrator is someone who will oversee this account.
  • You are responsible for setting up your team, billing, and managing secure credentials.

How to create your Social Good Software account?

1: Create your account

You will have received an email from your account manager, there will be a link in it that will redirect you to the page where you can create your account.

NOTE: If you do not have an account manager, please schedule a strategy session with us and we will set up an account manager for your account.

While creating the account, it is really important that you are the actual administrator of this account so that you can fill in all the correct information for your organization.

NOTE: If you are not an administrator then you’ll receive a separate request to join the application please DO NOT fill in this form. Wait until your administrator has registered, then you will be invited to join.

Fill in the following fields:

  • First name
  • Last name
  • Your organizational email
  • The legal name of the organization
  • Organization website URL. Example – www.artic.edu
  • Your secure password
Create an account with Social Good Software
Organization Details
  • Review the “Privacy Agreement” and “Terms of Service” documents.
Create an account with Social Good Software
Review the terms of service and privacy agreement.
  • Verify you are a real person using the google captcha.
Click on the “I’m not a robot” checkbox
  • Once verified, click the “Register” button to request access to your new account.
Create an account with Social Good Software
Click on the “Register” button

2: Verify your account

If you register, you’ll be asked to verify your email address. A verification code will be sent to your email address, open it and fill in the field with your verification code.

Create an account with Social Good Software
Account Verification Required

Click on the “Verify Account” button.

You’ll be redirected to the login page, fill in your email and password to log in for the first time.

It’s important that you attempt to log in to notify your account manager that your account was created successfully.

Log in with your credentials

3: Account Approval

You’ll see a prompt of “Awaiting Account Approval”.

Account waiting approval

Your account manager will then approve your account which could take up to 48 hours. Once the account gets approved you will receive an email letting you know that you now have access to the application and may now use your credentials to log in.

4: Login into your account

Enter your credentials again to login into the application.

Congratulations! Your account is created. If you have any questions or problems, please contact us. We are always happy to help with any issues that may arise.

Tips on how to fill out the form

  • You can have more than one Administrator.
  • Keep in mind that when you fill out the form, you must provide your organization’s information and not your personal information.
  • Have feedback or questions about a field? Make sure to reach out using the feedback form.

Filed Under: Account, Account, Help Center

How to Set Up Google Analytics eCommerce Tracking For Altru

September 12, 2019 By admin

The first step to getting Google Analytics tracking set up correctly with Altru by Blackbaud is to figure that eCommerce and enhanced eCommerce are enabled in Google Analytics.

If you have not setup Google Analytics with Altru you must first complete that step before you can move into tracking cart transactions with Altru. Not sure how to do this? Get in contact with us.

Login into your Google Analytics account and make sure you are under the correct account you will be enabling eCommerce and eCommerce enhanced.

Go into the third column and select ECommerce Settings.

Then you are going to want to enable Ecommerce and Enhanced Ecommerce Reporting inside of the Ecommerce Setup Screen.

Ecommerce basic module only allow you to add items and link them with a transaction, but it does not allows you to remove items from shopping cart.

Enhanced eCommerce tracking module you can track all the customer shopping experience, including adding and removing items from shopping cart.

Select the Save option inside of Google Analytics

After you have click on saved you are set with Enhanced eCommerce but your not exactly done. Next steps are to have a custom JavaScript snippet created to run on every part of the cart to execute what items are being purchased with a price, category, name, quantity, and totals.

The JavaScript code can easily execute with the Online Template application. Here is where you can manage the JavaScript so it’s always up to date with any updates from Google.

Missing the JavaScript snippet? Reach out to us we are happy to work together with you to create one just for your organization.

Filed Under: Google Analytics, Help Center, Online Template

How to import Altru Calendar into Outlook

September 10, 2019 By admin

Learn how to import your custom Altru Calendar created by the Calendar Builder application into Outlook.

You must have created a Calendar before you can export the calendar into Outlook. If you have not created your calendar go ahead and create it first.

You must have Outlook Live to be able to add a custom calendar from the web. Go into your Outlook account and login. As of this writing, you’re not able to add a custom calendar on the desktop client for outlook.

This is typically your organization URL for office 360 online. If you don’t have one you can use the general URL outlook.live.com/owa/.

Once you have logged in head to the calendar section of Outlook. Inside the calendar, section click on the “Import Calendar” option.

Click on the import calendar option

Once you click on the button you will get a dialog to import a calendar. You will need to click on the “From Web” option to be able to import your calendar into outlook.

Click on the “From web” option on the left-hand side

You will need the link to the URL for the calendar and the calendar name. Let’s first start with the URL for the calendar. Go and find your calendar inside the Calendar Builder and click on the Share tab.

Click on the “Share” tab for your calendar

Then you are going to want to click on the “Copy Link” button to bring over the URL for the calendar into the outlook dialog by pasting into the “Link to the calendar” field. Next, give your calendar a custom name.

Click on the “Import” button.

Once you click on the import button your calendar events will get imported into your calendar in outlook. This applies to both the web version and the desktop client.

Please be patient as it can take up to 25 minutes for the events to show up on the desktop client. The time varies based on Microsoft’s servers.

Events synced with the desktop client

Once you see your events in outlook they will be automatically synced from the Calendar Builder application.

Filed Under: Calendar Builder, Help Center, iCalendar Feeds

Social Good Software | Altru software integrations | Deduper | Calendar Builder | Email Designer | Barcodes Reader | Checkout Flows | Membership Portal | Online Template | API Integrations