• Skip to primary navigation
  • Skip to main content

Social Good Software

Creating amazing guest experiences through innovative software solutions for the social good community

  • Features
    • Deduper
    • Calendar Builder
    • Email Designer
    • Barcodes Scanner
    • Online Template
    • Checkout Flows
    • Membership Portal
    • Data Bridge
  • Pricing
  • Contact
    • About
    • Contact
    • Feedback
    • Careers
  • Login
  • Get Price

Data Bridge

Implementation Guide – Data Bridge Integration with Constant Contact

October 20, 2022 By Albert Bartolome

A complete implementation guide of Data Bridge integration with Constant Contact.  

All procedures in this document are compatible with the SGS app version V1.3.3.

In summary, this document covers the following:

  • Assigning Roles and Permissions in Altru
  • Creation of queries in Altru
  • Configuring the Social Good Software application (app.socialgoodsoftware.com).

For other concerns and related articles, please visit help.socialgoodsoftware.com or email us at implementation@socialgoodsoftware.com.

Please reach us at support@socialgoodsoftware.com for your questions, clarifications, and other concerns. We are always happy to help!

Filed Under: Data Bridge, Help Center, Implementation Guide, Implementation Guide

Membership Card IDs walkthrough

October 14, 2022 By Hezel Dalimoos

Social Good Software helps you create Digital Membership Card IDs for your organization that your members can download in PDF form and save to their Apple Wallet and Google Pay. To help you set up your Membership Card ID, we will first identify the feature of your membership card and then discuss some variables to understand when to use them.

Membership Card ID Settings

1: View all options available to set up your Digital Membership Card IDs by logging in to your Social Good Software account. Proceed to Development, then Membership Cards. 

2: Click Add Membership Card to create a new card or select the existing Digital Membership Card that you want to set up.

3: You can now view all the options to set up your membership cards. This guide will focus on Membership ID, Constituent Membership ID, and Custom field.

Custom Field

  • It is only available on iOS and android.
  • The value you enter by typing it in (Great for member benefits).
Membership Card IDs
  • Only works on the back of the digital cards (Not the web version)
Membership Card IDs

Constituent Membership ID

  • It is the Look-up ID for the constituent in Altru.
Membership Card IDs
  • We need to reference this as the membership so the label says “Membership ID” even though it’s the lookup ID.
Membership Card IDs

Membership ID

  • It is the value attached to the membership.

We hope this guide helps you distinguish between the two Membership IDs in your Digital Membership Card and be able to determine when you can use the Custom Field. If you have questions, please reach us through our support channel or email support@socialgoodsoftware.com. We are always happy to help!

Filed Under: Development, Digital Membership Card, Digital Membership Cards, Help Center, Implementation Guide

How to authorize Constant Contact for the Data Bridge

April 25, 2022 By Anya Elgueta

Authorize-Constant-Contact-with-Social-Good-SoftwareDownload

Filed Under: Data Bridge, Help Center, Implementation Guide, Integrations

How to authorize Mailchimp for the Data Bridge

April 25, 2022 By Anya Elgueta

Authorize-Mailchimp-in-Social-Good-SoftwareDownload

Filed Under: Data Bridge, Help Center, Implementation Guide, Integrations

How to create an attribute with Altru for a mailing list

April 13, 2022 By Rick Hernandez

Create an attribute with Altru for a mailing list to add greater dimension to your constituents. With this attribute, you can tag someone with specific mailing lists. You can also include and exclude individuals using this attribute. This is useful when sorting email lists out especially with events or tiered membership level perks.

Creating an attribute with Altru for a mailing list

1: Go to your Altru account.

2: Proceed to Administration.

3: Move on attribute categories.

Create an attribute with Altru for a mailing list

4: Click on Add.

Create an attribute with Altru for a mailing list

5: A dialog box will pop out where you need to supply the needed details. When you create a new name for an attribute, keep in mind that it should be easy to understand and correspond to the list you are creating it for. Once done, click Save.

Name: Must after the list you are creating for
Record type:
Constituent (make this attribute attach to all constituents)
Data type:
Yes/No
✅
Allow only one per record

Create an attribute with Altru for a mailing list
Note: Make sure to check the box that allows only one per record to work this attribute correctly. This will override whenever someone opts in or out of the specific attribute.

If you want to create another attribute, just click on the Add button or repeat the process above.

Summary

Knowing how to create an attribute with Altru for a mailing list is helpful in organizing and sorting mailing lists so you can create more targeted emails for a more targeted audience. We also recommend that you add all the attributes that you can use throughout your list for proper segmentation.

 If something is unclear in this article or if you have other questions, please contact us anytime!

Filed Under: Data Bridge, Help Center, Integrations

Types of emails for eTickets

January 27, 2022 By Rick Hernandez

eTicket-email-optionsDownload

Introduction

Email designer is an app that allows you to customize and send automated emails for your Altru transactions. This tool is useful for different types of emails for eTickets because through it you can send messages with tickets in PDF form. Guests are no longer need to click on the link to download the ticket since it was already replaced by a ticket in PDF form.

In this guide, you will learn what are the types of emails for eTickets, the components of each email, and some of the Frequently Asked Questions (FAQ) that we received regarding this topic. 

How to set-up your emails in three (3) steps:

1. Write your email in Google Docs or Microsoft word

  • We recommend that you first draft your email to Google docs or Microsoft word and check that you include all the merge fields that you need.

2. Create your query and note type with Altru for your email

  • Make sure that your query identifies who the receivers of the email are. Create a Note type in Altru to be able to monitor if the emails were sent.

3. Setup the Email Designer with your content and query.

  • To be able to send out this email, put together the content and the query to the Email Designer. 

The process of setting up your emails starts from running the query and feeding it to the Email Designer. If there are individuals who match the query, an email for that particular person will be sent out. Once the email was sent out, the app will grab a copy of it and attach it to Altru as Note Type so there will be an email attached inside the particular sales order.

Three (3) Types of Emails for eTickets

1. eTicket Email is great for sending out a PDF that auto generated an eTicket number and a PDF with their tickets.

types of emails for eTickets

There are two emails that Altru sends out. The first email is about what the guests’ purchased and the second is the link to their eTicket. 

With the use of the Email Designer, we will replace the second email that Altru sends which is the link to their ticket with our eTicket email where we will instead attach a PDF to the tickets.

2. Reminder Email is great for sending out a reminder of their upcoming visit with tickets attached as a PDF. This email can go out the day of or one day before.

types of emails for eTickets

3. Post Visit Email is great for following up with guests who have visited. You can send a membership offer or just collect feedback on their experience. 

types of emails for eTickets

It is an email to thank  the guests for visiting. Typically sent out the day or the following day after the visit.You can send this email without PDF or tickets.

Frequently Asked Questions (FAQ)

1. Do these emails account for sales orders over the phone, online and in person?

  • The discussed type of emails above will account for all three types of sales methods. You can also exclude a specific sales method at the query level.

2. If I manually resend an email, will my tickets be updated?

  • Yes, If you resend an email the tickets will be generated at the time the email is being sent.

3. If I delete the note type from the sales order, will the email go out with the right tickets?

  • Yes, the query is looking at sales orders that do not have a note type and sends an email. If you remove the note type from the sales order, another version of an email will get off with another PDF. Typically, you won’t be doing this unless you need to resend it.

4. If I open the eTicket preview on the Email Designer, will I see the latest ticket available?

  • Yes, you will see the latest ticket  available whenever you click on the link

The purpose of this documentation is to help you understand the three (3) types of eTicket emails, and how these emails work so that it will be easier for you to create and set up eTicket emails based on their type for your organization.

Filed Under: Digital Membership Card, Email Designer, Emails, Help Center, Implementation Guide, Implementation Guide

Emails you need to set up for Digital Membership cards

December 29, 2021 By Rick Hernandez

Introduction

There are many transactional emails for Digital Membership Cards that we can configure with Email Designer. Because of that, we create this documentation for you to fully understand the functions and importance of these emails.

Knowing how these emails work and when to use it will help you better understand what emails you need to set up with your Digital Membership Cards and which one applies for your Membership Portal.

Different emails for Digital Membership Cards :

Launch Email

Useful in announcing your new Digital Membership Cards to the entire membership base of all active members of your organization. 

  • It is an automated email that you send out to the entire membership base of active members. You can use this launch email to inform members about the new Digital Membership Cards that the organization is officially launching or about the Membership Portal.
  • It is a one-time email announcement that you can send out to your active members. Receivers of this email are between 2,000 to 50,000 constituents depending on how many members your organization has.
  • Launch email will not be of use anymore after sending it to all active members. But there is an exemption which is when the organization resends it to their Board Members in the following year. You can turn on this email for that particular one-time communication.

Automated Welcome Email

Use to welcome all your new members who purchase online, advance, and daily sales. You need to have a sales order to be able to send this email.

  • An email that runs continuously in which once triggered will automatically send out to welcome those individuals who signed up and become new members as well as those who renewed their membership.
  • It is an automated welcome email that requires a sales order. If someone purchases through online, advance and daily sales, he/she will get a welcome email informing that he/she  purchased this particular membership.

Back Office Gift Email

Welcome email for the recipients or givers of the members who purchase through the back office. Useful for automatically sending out gift emails with gift messages.

  • It is an automated welcome email that you can send to the recipient and gift-givers of the members. Members who purchase through the back office that contain gift messages that can customize are the receiver of this email.

Automated Gift Email

Welcome email for recipients or givers of the members who purchase online, advance, and daily sales. Useful for automatically sending out gift emails and gift messages.

  • An automated welcome email sent to recipients and gift-givers for purchasing online, daily, or in advanced sales. It contains a gift message that can customize depending on how the organization wants to set it.

Back Office Email

An email that welcomes all your new members who purchase via mail-in or you enter manually. A sales order is not necessary to send this email.

  • A welcome email that automatically triggers to welcome new members who purchase through mail-in, entered manually, or through the batch. Sales order is not necessary for this kind of email to receive.

Reminder Email

Send out reminders for your members 120, 60, 30, 15, 7 days before the membership’s expiration date.

  • An automated email that you can send out to remind members to renew their membership. You can set it up once to send out on certain days before the expiration date.
  • You can also customize the specific day you want to send the reminder email.

Lapsed Membership Email

Send out follow-up for your members 7, 15, 30, 60, 90, 120 days after their expiration date.

  • A follow-up email that you can set up once and send out at a specific time after the expiration date of membership to those members who haven’t renewed.

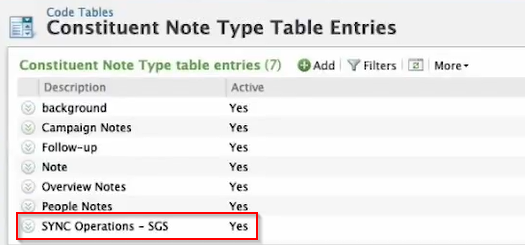
Manual Tagging Email

Useful for those that want to receive the email again regardless of the method of how they purchased their membership. To be able to trigger the email, you have to do manual tagging with note type.

  • A welcome email that you can trigger by tagging a membership. Use this email when a member requests to resend the welcome email due to some reasons like they lost the original message, lost access to their email or just wants to email them again the welcome email.
  • Manual Tagging is useful whenever there are requests to receive their welcome email again regardless of the method they use to purchase their membership. It also required notes for this email to be triggered. 

Auto Renew Email

Send auto-reminders for payments on credit cards being used for auto-renewing memberships. This can go out relative to the expiration date.

  • This email is for everybody who is auto-renewing their membership.
  • Auto-renew email is sent out informing members who use credit cards for payment about their membership renewal which will automatically charge to their cards. 
  • This email can go out before or after the credit card gets charged. It is up to you when you want to send the auto-renewal email but we recommend sending this email out 2 weeks before the credit card gets charged to catch any changes on the card.

Below is a matrix that you can use as a guide. It will let you know what activities each of these emails covered.

Emails for Digital Membership Card

Summary

You now have an idea what are the different emails for Digital Membership Card that you can configure with Email Designer. This will make it easier for you to identify which email is applicable for a certain activity and which one is sent out for a specific transaction.

If you have more questions please reach out to us through our support channel.

Filed Under: Digital Membership Card, Email Designer, Emails, Help Center, Implementation Guide

How to create a membership note type

December 11, 2021 By Rick Hernandez

It is very useful to create a membership Note Type for your queries. You can utilize it for any queries like manual tagging, sending emails for batch orders, and sending emails for advance, daily, and online sales.

Steps to create a membership Note Type

1: Go to your Altru account and click on Administration.

2: Proceed to Code Tables

3: Under Code Tables, click on Filters. On the drop-down menu, select Membership and click on Apply. It will then bring you to the list of Membership categories for the Code Tables.

4: Click on the Membership Note Type.

membership note type

5: On the Membership Note Type Table Entries, you need to click the Add button.

membership note type

6: After clicking the Add button, a dialog box will appear where you can write down the kind of Note Type you are creating. Click OK.

membership note type

7: Well done! You now have your Note Type. Add more by clicking the Add button and doing the same process.

membership note type

You can also check the guide on how to create a SYNC Operations note type to learn more about creating a note type.

Please reach us through our support channel if you have questions or clarifications. We are always happy to help!

Filed Under: Altru, Digital Membership Card, Email Designer, Help Center, Implementation Guide

How to create a query for mail provider using Altru

December 9, 2021 By Rick Hernandez

Introduction

Below is a detailed process of creating a list that can sync over to either Constant Contact or Mailchimp. Take note that you will undergo the same process of creating a list of individuals whether you are using Constant Contact or Mailchimp and whether it is the main list or a sub-list. Make sure to include all the recommended information whenever you create a query for a mail provider.

The process starts by creating an attribute needed for the query and then going through the process of creating the query itself. Refer below to fully understand the process and to know what are  the needed information:

Process of creating an Attribute

1: Go to Altru and click on Administration then proceed to Attribute Categories.

2: Click Add which will prompt you to a dialog box.

3: Make sure to create a category for a specific segment and if you have a sub-list then you need to tag it differently. Supply the needed information in the Dialog Box based on the details below before you click Save.

Name: Base it on the particular segment you are working on
Record type: Constituent
Data Type: Yes/No
Make sure to ✅ Allow only one per record.

Note: You can add sub-lists as you want which is based on the main list but it still needs to undergo the same process above.

Steps on how to create a query for mail provider in Altru

1: After creating the Attribute, you can now proceed to Analysis and click on the Information Library.

query for mail provider

2: Click on Add an ad-hoc query which will redirect you to another Dialog Box.

query for mail provider

3: Select Constituents then click OK.

query for mail provider

4: You can now add fields to your query. Below are the recommended fields needed to make the syncing of information with Mailchimp or Constant Contact work. Just note that if you have a segment that you want to create, all you have to do is to follow the same process but make sure to include the specific segment you are working with. 

query for mail provider

Note: You can rearrange the fields based on your preference.

5: Click on the Set save option to name your query, write a description, select its category and designate a folder then Save and close.

query for mail provider

6: Great! You have officially created a query. You can now use the OData Link with the Data Bridge. 

query for mail provider

Adding Sub-list to the current query for a mail provider

To add a specific segment to your query, you need to go through the same process and add the particular segment you want to include. You can also go to Edit Definition if you already have an existing query and add the specific segment.

1: Go to Edit Definition and proceed to Attributes. 

query for mail provider

2: Double click the sublist that you want to include.

3: Select Value before dragging it to the Results field to display.

4: Lastly, add the logic applicable for your sublist.

query for mail provider

You now have your attribute and a query for your mail provider. If you have more questions please reach out to us through our support channel.

Filed Under: Altru, Data Bridge, Help Center

How to create an unsubscribed attribute with Altru

November 1, 2021 By Rick Hernandez

Introduction

To determine those individuals who unsubscribed, you just need to create an unsubscribed attribute with Altru. Do it once and it will be shared among all of your lists of members.

Steps on how to create unsubscribed attribute with Altru:

1: Open ALTRU and click ADMINISTRATION.

unsubscribed attribute with Altru

2: Proceed to ATTRIBUTE CATEGORIES under Data

unsubscribed attribute with Altru

3: Click ADD to create new attribute.

unsubscribed attribute with Altru

4: A dialog box will pop out. Input the following and click Save.
Name: Unsubscribed
Record type: Constituent
Attribute group: N/A
Data Type: Yes/No
Note: Make sure to click on the ‘Allow only one per record’ checkbox.

Once done with the steps above, you can now connect it all together with the Data Bridge which is very useful in attaching those unsubscribe attributes.

If you have more questions, please reach out to us through our support channel.

You can also check the tutorial on How to create an attribute for a segment with Altru.

Filed Under: Altru, Data Bridge, Help Center

  • « Go to Previous Page
  • Go to page 1
  • Go to page 2
  • Go to page 3
  • Go to Next Page »

Social Good Software | Altru software integrations | Deduper | Calendar Builder | Email Designer | Barcodes Reader | Checkout Flows | Membership Portal | Online Template | API Integrations