Online Template is an easy-to-use tool to customize your web forms. In this documentation, we will discuss how to use the tool and its available components. Also discussed is how to preview pages with the Online Template without swapping out those web forms in Altru and before these forms go live.
With this tool, you will be able to preview your web forms and anything that is being sold online. Remember that this is just a preview. Not everything works as it would be in the production because there are limitations.
We will not be able to show you exactly everything from checkout to cart and confirmation to the credit card but we can show you the first part which is the checkout side. When you are already in this step, the remaining work is for you to preview the pages and make sure that everything looks good and meets your expectations before we move forward.
Online Template Designer
It was already a pre-configured tool but if you want to make changes, you can use the little icons below.

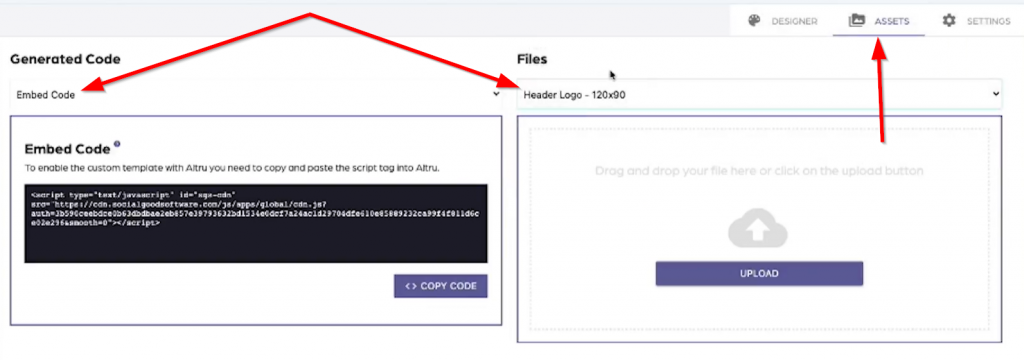
Assets
You can upload your favicon, logo for your header and footer, background, and things like that. You also have the option to upload custom fonts and embed codes to generate CSS code, header code, and footer code.

Settings
Below are the options that you can turn on if you want to include values but the SGS team is the one responsible for this, however, if you want to confirm email addresses, URLs, and things like that, you can go here to check it out.

Preview pages with the Online Template
Step 1: Copy the URL of the page that you want to preview from Blackbaud.
Step 2: Go back to the Online Template tool and click on Add URL.

Step 3: A dialog box will pop out where you can type in the name of the page and paste the copied URL then click Add.

Step 4: On the Preview page there is now an item added. Wait until the designer loads the page for preview which will take a while. Essentially what we did is downloading the page from Blackbaud, apply all the stylistic changes then preview the page.
Step 5: You can click on the Save icon at the bottom and wait as the designer loads the page. In this case, there are no changes applied yet so the page loaded to the designer is totally identical to the Blackbaud. But if you click on the new tab icon, the URL is totally different from the Blackbaud so you can now actually share this link with your colleagues to preview.
Step 6: Let us try to apply some fixes to the webform and see what it looks like. On the Setting side, we will enable the following:
✅Template Fixes
✅Translation menu
✅Empty Cart
✅Member dialog
✅WCAG 2.1
✅Email Validation
Step 7: Go back to the designer and wait as it reloads the preview. Click on the new tab icon to better see the changes made and make adjustments accordingly.
You now have a better understanding of how Online Templates work. The purpose of this documentation is not to configure the template but to show you the process of adding different pages to preview and make necessary changes before your web forms go live.